

The HubSpot 360nrs Connector is a tool that integrates HubSpot with the 360nrs communications system to automate SMS sending, voice calls, and interactive voice calls, allowing companies to centrally manage multi-channel campaigns.
You can send individual SMS messages, automate them through workflows, or segment contact lists for more targeted communication. Additionally, the integration makes it easy to personalize messages based on contact characteristics, improving campaign relevance. Detailed sending statistics will allow you to evaluate the impact of each campaign and adjust your strategy for better results.
This multi-channel solution optimizes the way you connect with your customers, improving engagement and conversion rates.
With this integration, you'll have complete control over the process, from campaign creation to analysis. You can centrally manage your voice and SMS campaigns in HubSpot, facilitating the execution of more dynamic strategies. Configure access rules and specific conditions for different types of messages, ensuring each contact receives the information they're most interested in.
SMS: One-way channel for sending informative, transactional or promotional messages.
Voice: One-way channel for sending informative, transactional or promotional messages through telephone calls.
Interactive Voice: Two-way channel that allows the user to interact during the call using options or configuration, either through the keyboard or by voice commands.
For this integration to work correctly, the following prior considerations must be taken into account:
It is necessary to have an active 360nrs account with a validated tax profile and sufficient balance.
Senders can be numeric or alphanumeric. For numeric senders, the maximum length is 15 characters, and for alphanumeric senders, it is 11 characters. We recommend contacting our support team support@360nrs.com, as there may be restrictions that vary by country.
A standard SMS has a maximum of 160 characters using GSM7 encoding. Characters not included in GSM7 encoding will be automatically replaced with the closest GSM7 character. For example: á is not included in GSM7, so the system changes it to a, which is included. You can find all permitted GSM7 characters in the appendix.
Some characters included in GSM7 count as 2 characters. You can find the extended characters in the appendix.
If the SMS length is longer than the maximum allowed, the system will concatenate the necessary SMS messages up to a maximum of 5. (The end user sees this as a single SMS.)
To run voice campaigns, you'll need to speak with the 360nrs support team first to set up your voice routing.
Before sending your campaign, please review the Restricted Countries Appendix to see if the destination country has any restrictions on the sender's use. If it's listed, you should contact the support team to learn about the specific requirements and avoid potential delivery issues.
The plugin installs directly in HubSpot and takes minutes to set up. It automatically syncs existing databases, contact lists, and workflows. Use HubSpot's core features and start sending SMS and voice calls to your customers through the Workflows and CRM extension.
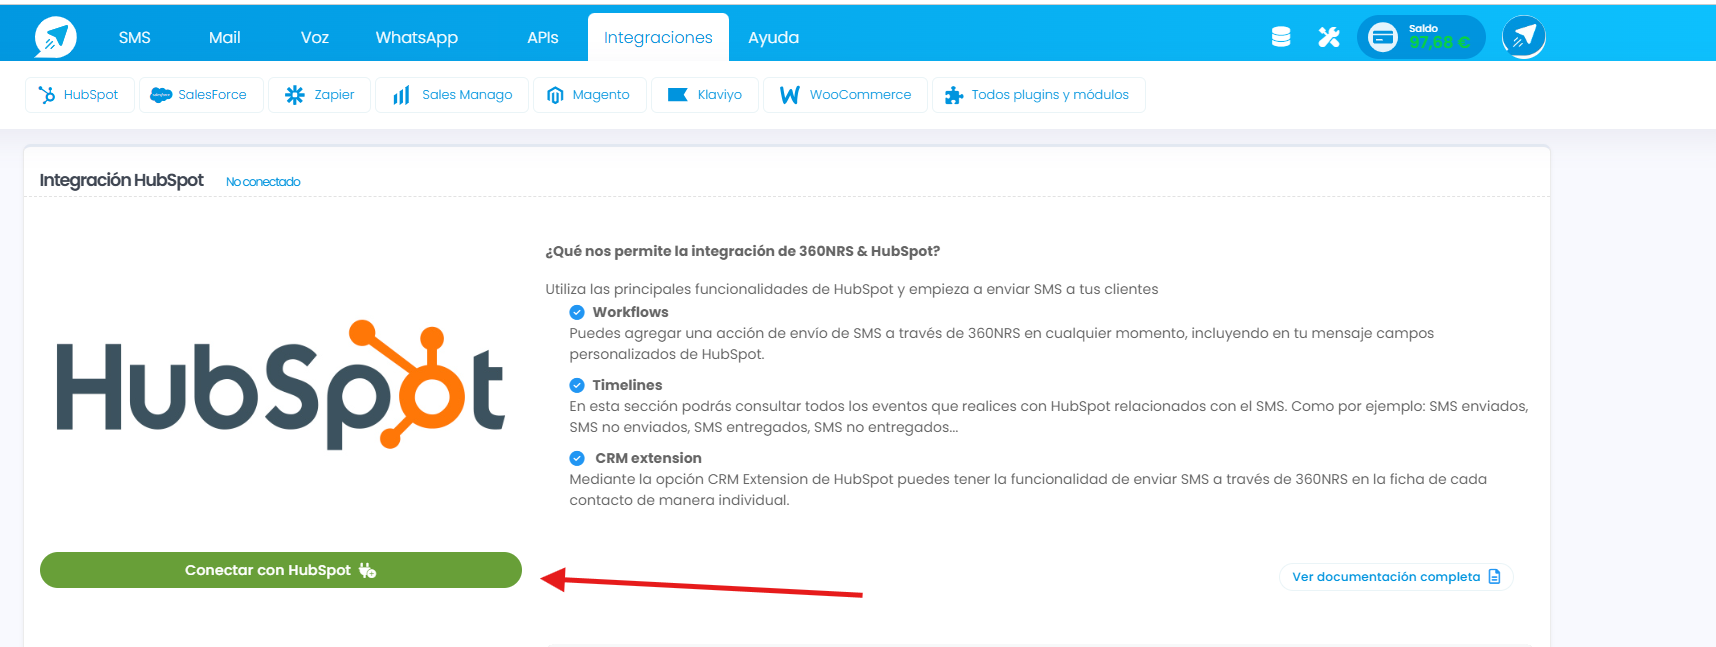
Log in to your 360nrs account on the website https://www.360nrs.com

Navigate to the Integrations tab and select the HubSpot connector.

Connect your account to HubSpot by clicking the "Connect to HubSpot" button. The "Connect" button will take you to HubSpot.
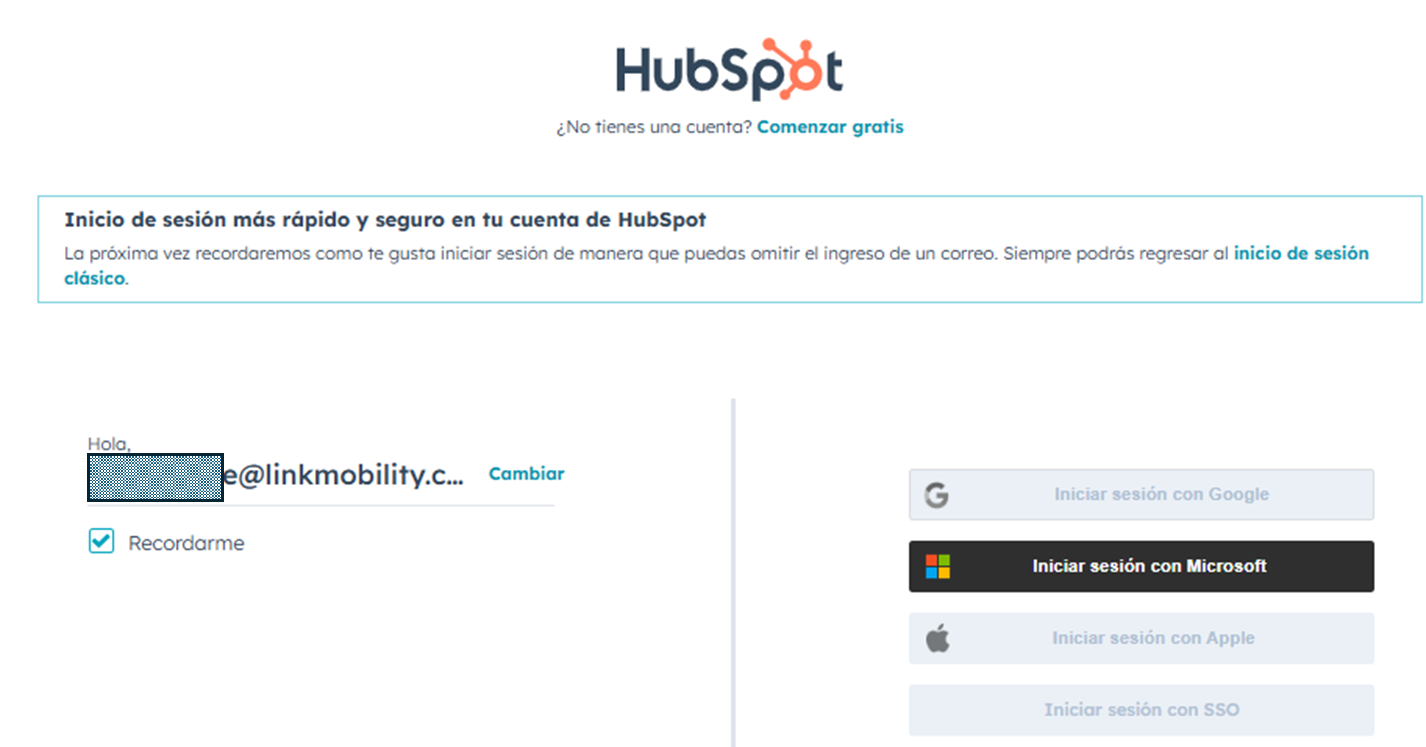
HubSpot will prompt you to log in to your account.
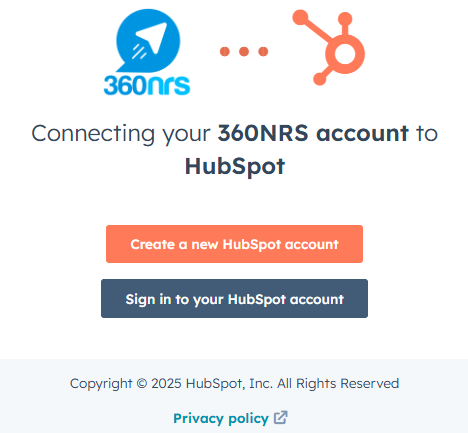
Log in with the HubSpot account you want to connect the service to.
Once you're logged in, your accounts will appear; select the one you want to connect.
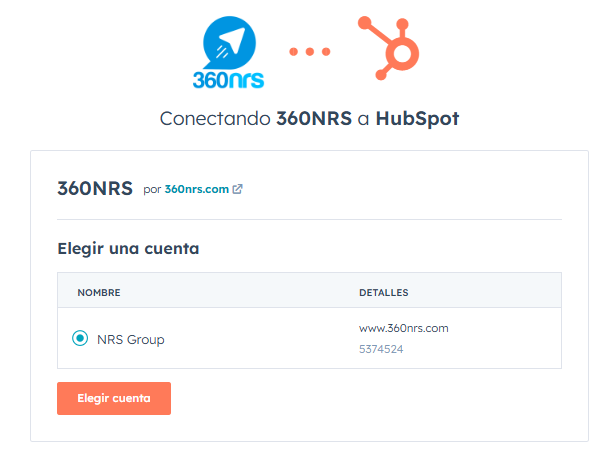
When you select the account you want to connect, you'll be asked to accept the permissions. If you don't have sufficient permissions to perform the integration, you'll need to speak to a SuperAdmin for your HubSpot account.
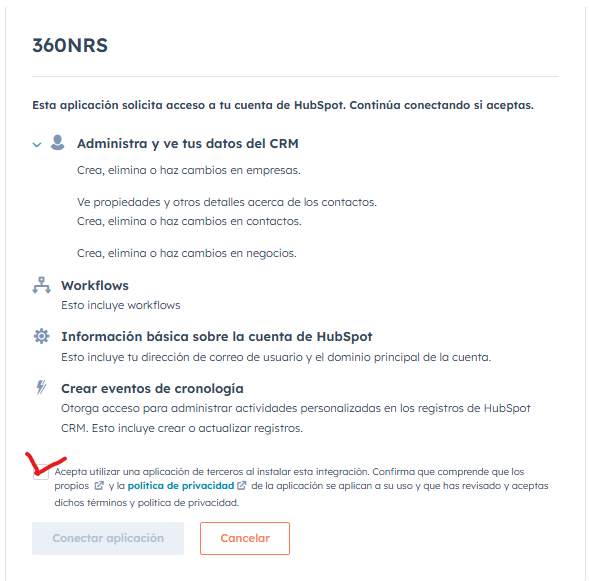
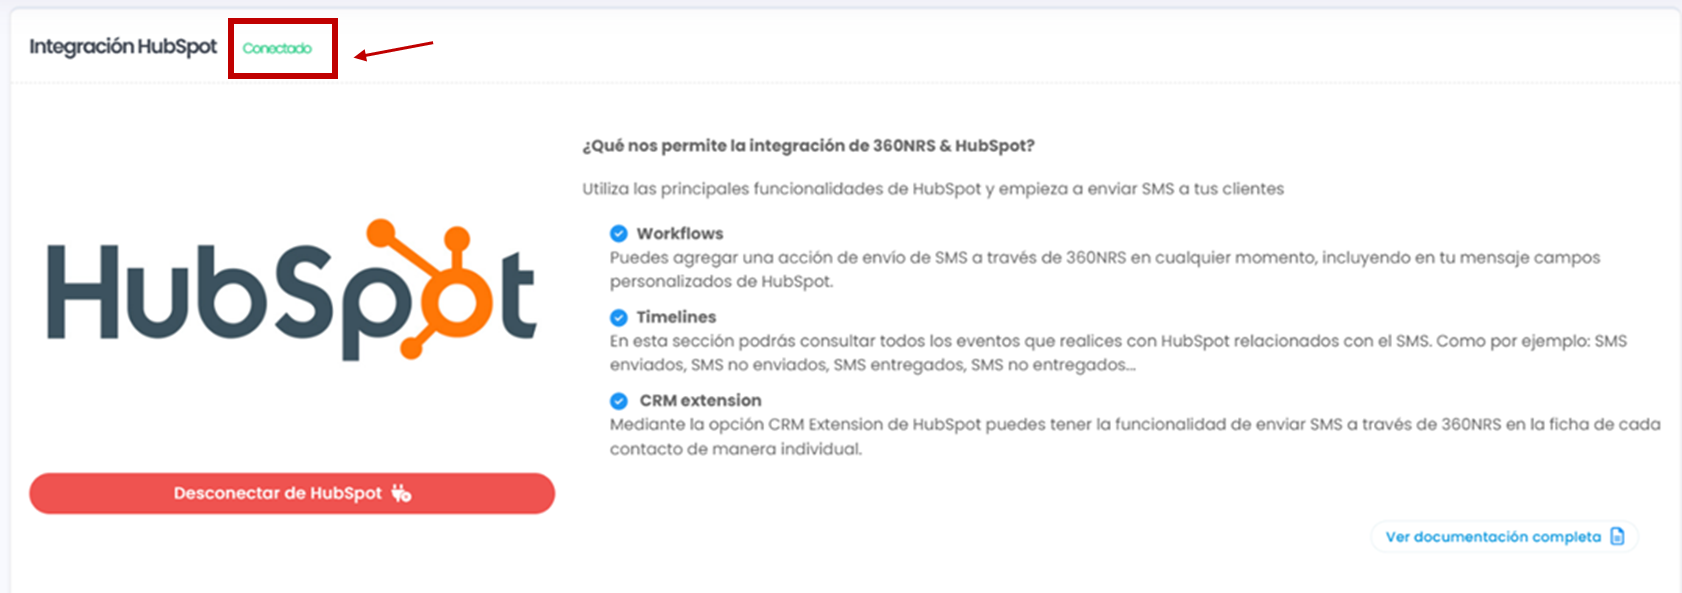
After accepting the permissions, you will be redirected back to 360nrs where, if everything went well, you will appear as connected.
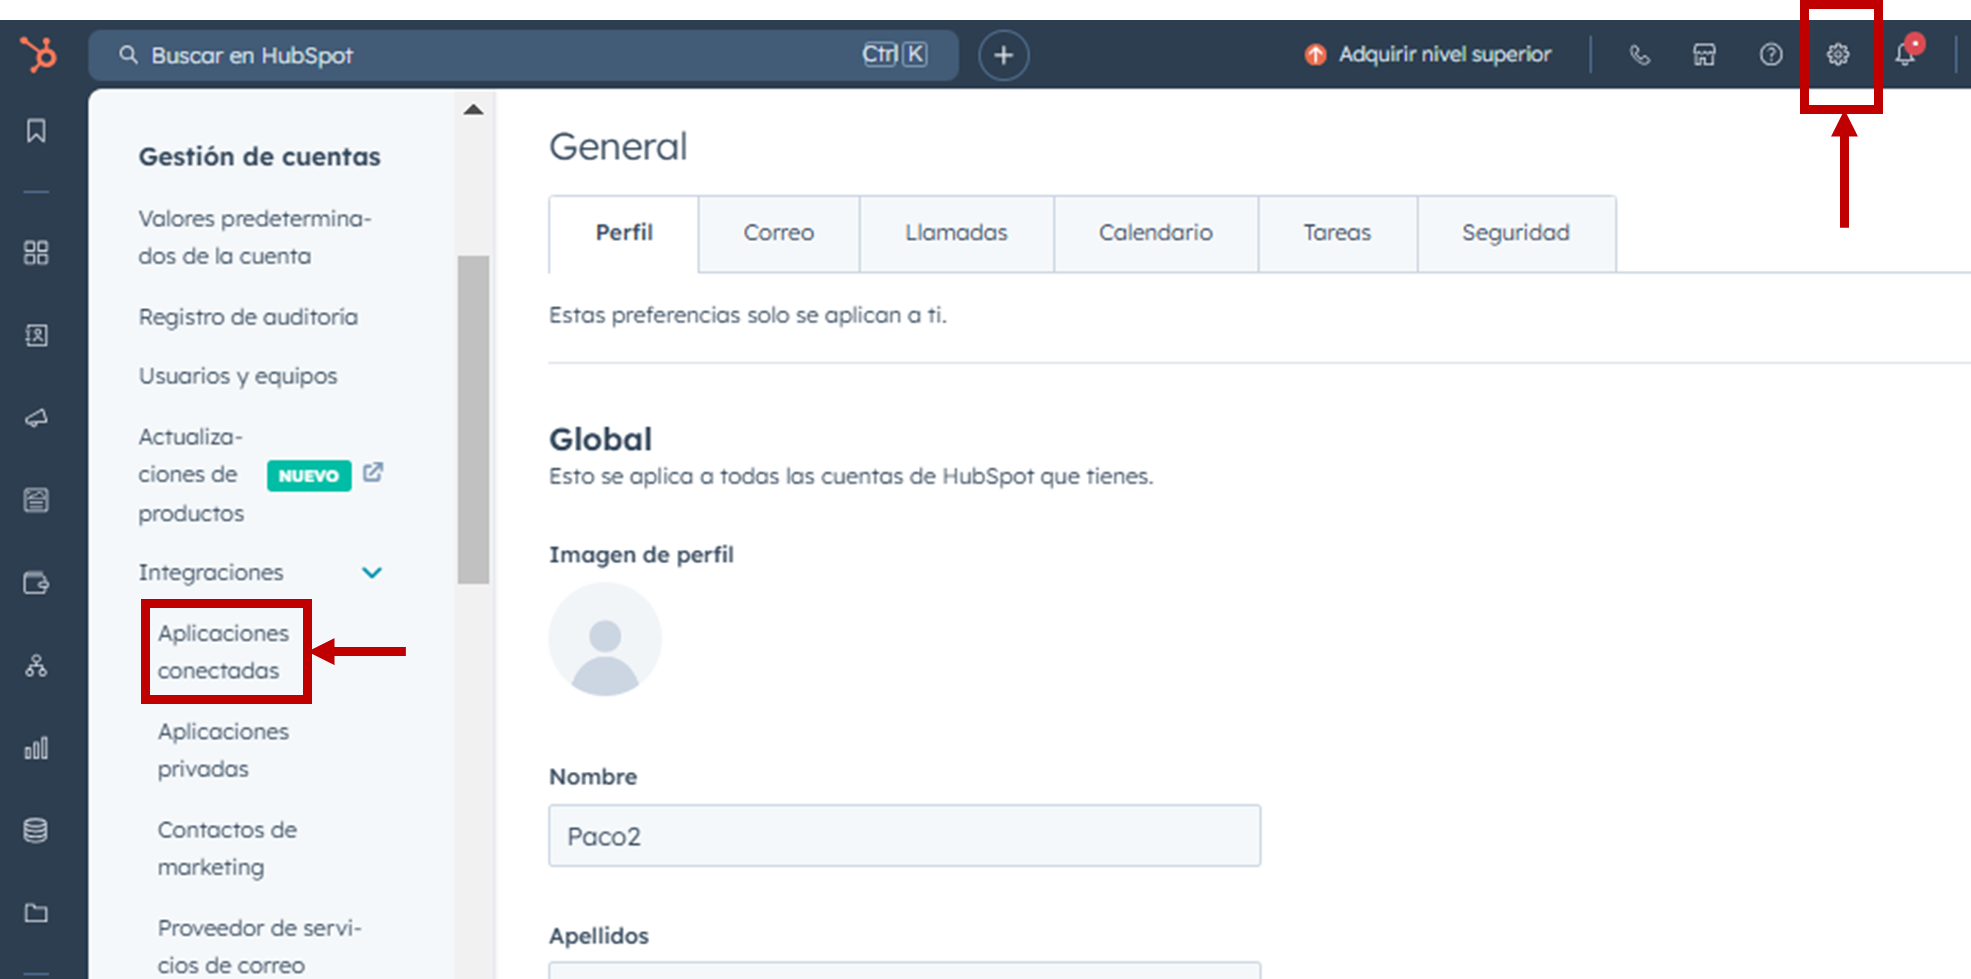
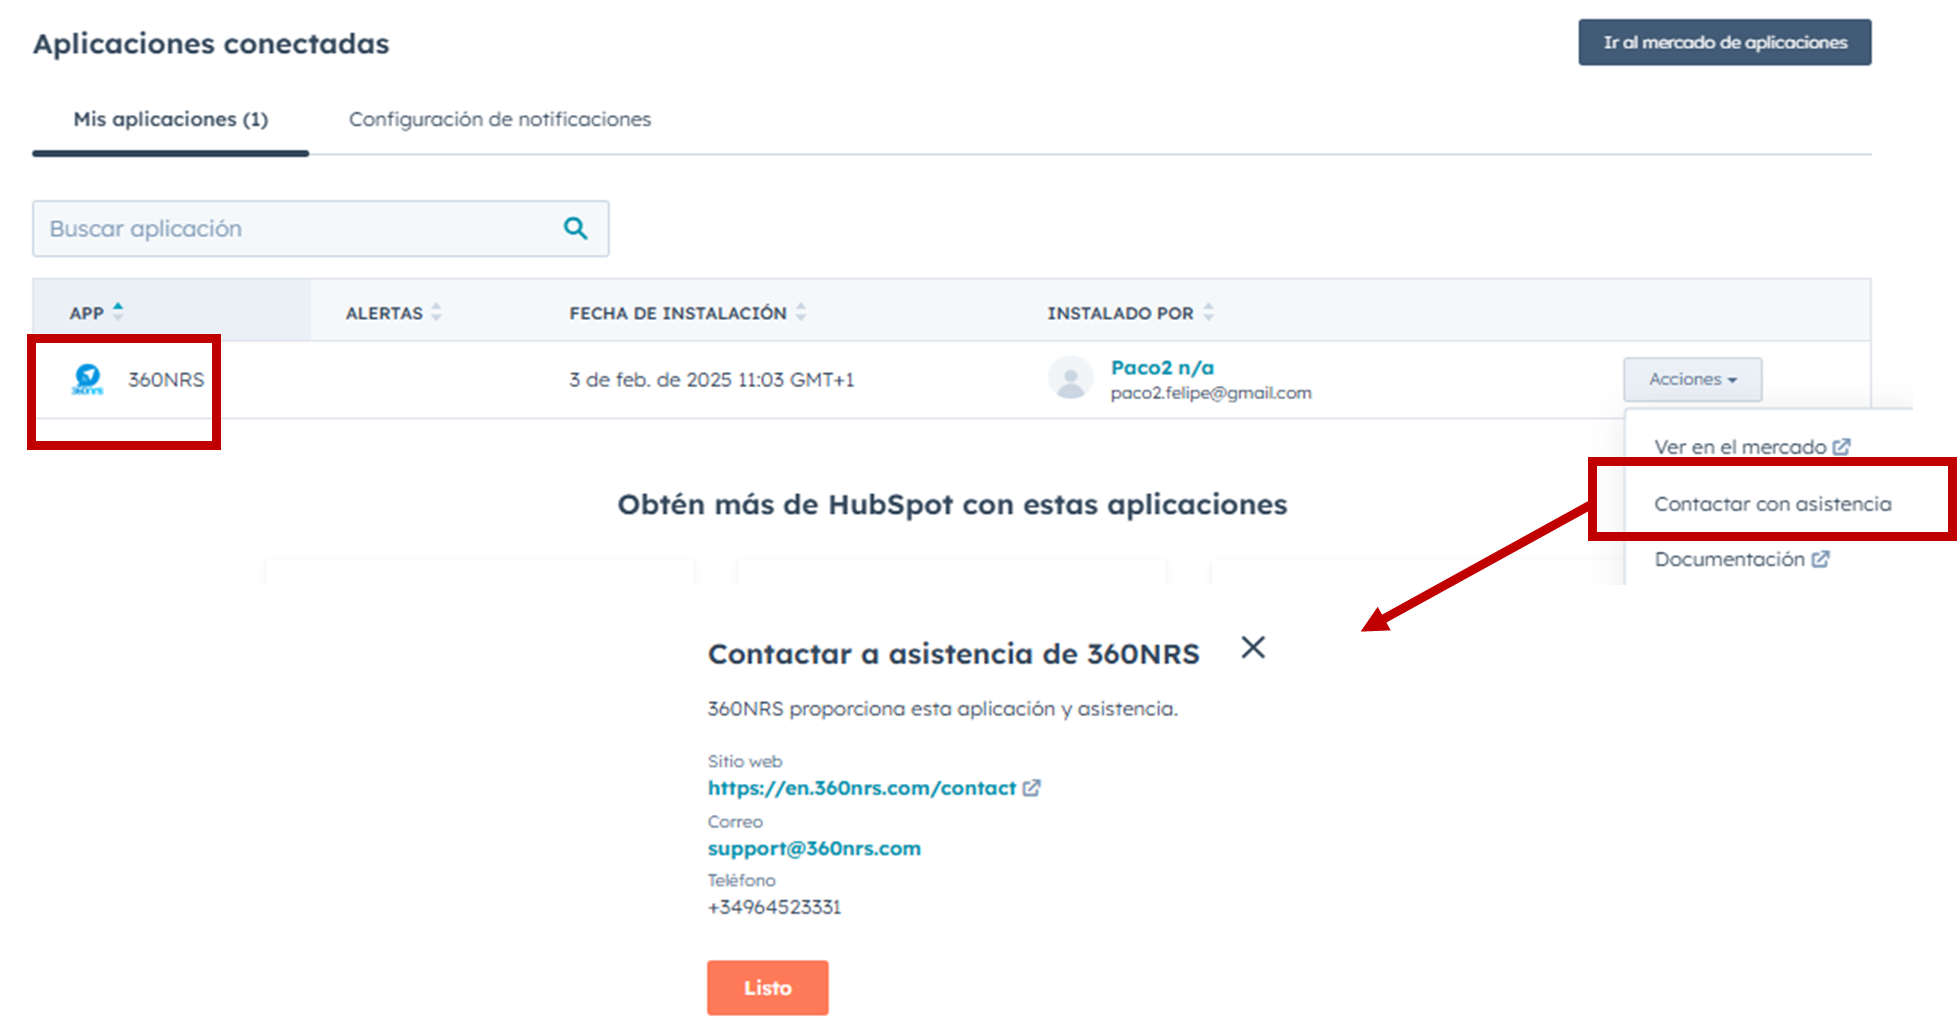
Once logged in to 360nrs, you can check if the connection to HubSpot was successful. To do this, go to HubSpot and click the settings button in the top right menu. In the left-hand menu, go to the Integrations section and select the Connected Apps tab. There you'll see the apps integrated with HubSpot. If the integration doesn't appear here, contact support at support@360nrs.com
In the Actions button you can find our contact information and a link to the documentation:
For the system to be able to send SMS and make voice calls, it is essential that you use a property containing the phone number. Make sure you comply with privacy and data protection laws and obtain user consent before sending messages.
The app can use existing properties in HubSpot, such as:
In addition, users can optionally create specific properties to use the integration.
These properties are not mandatory. If they are not created, you can use standard HubSpot properties.
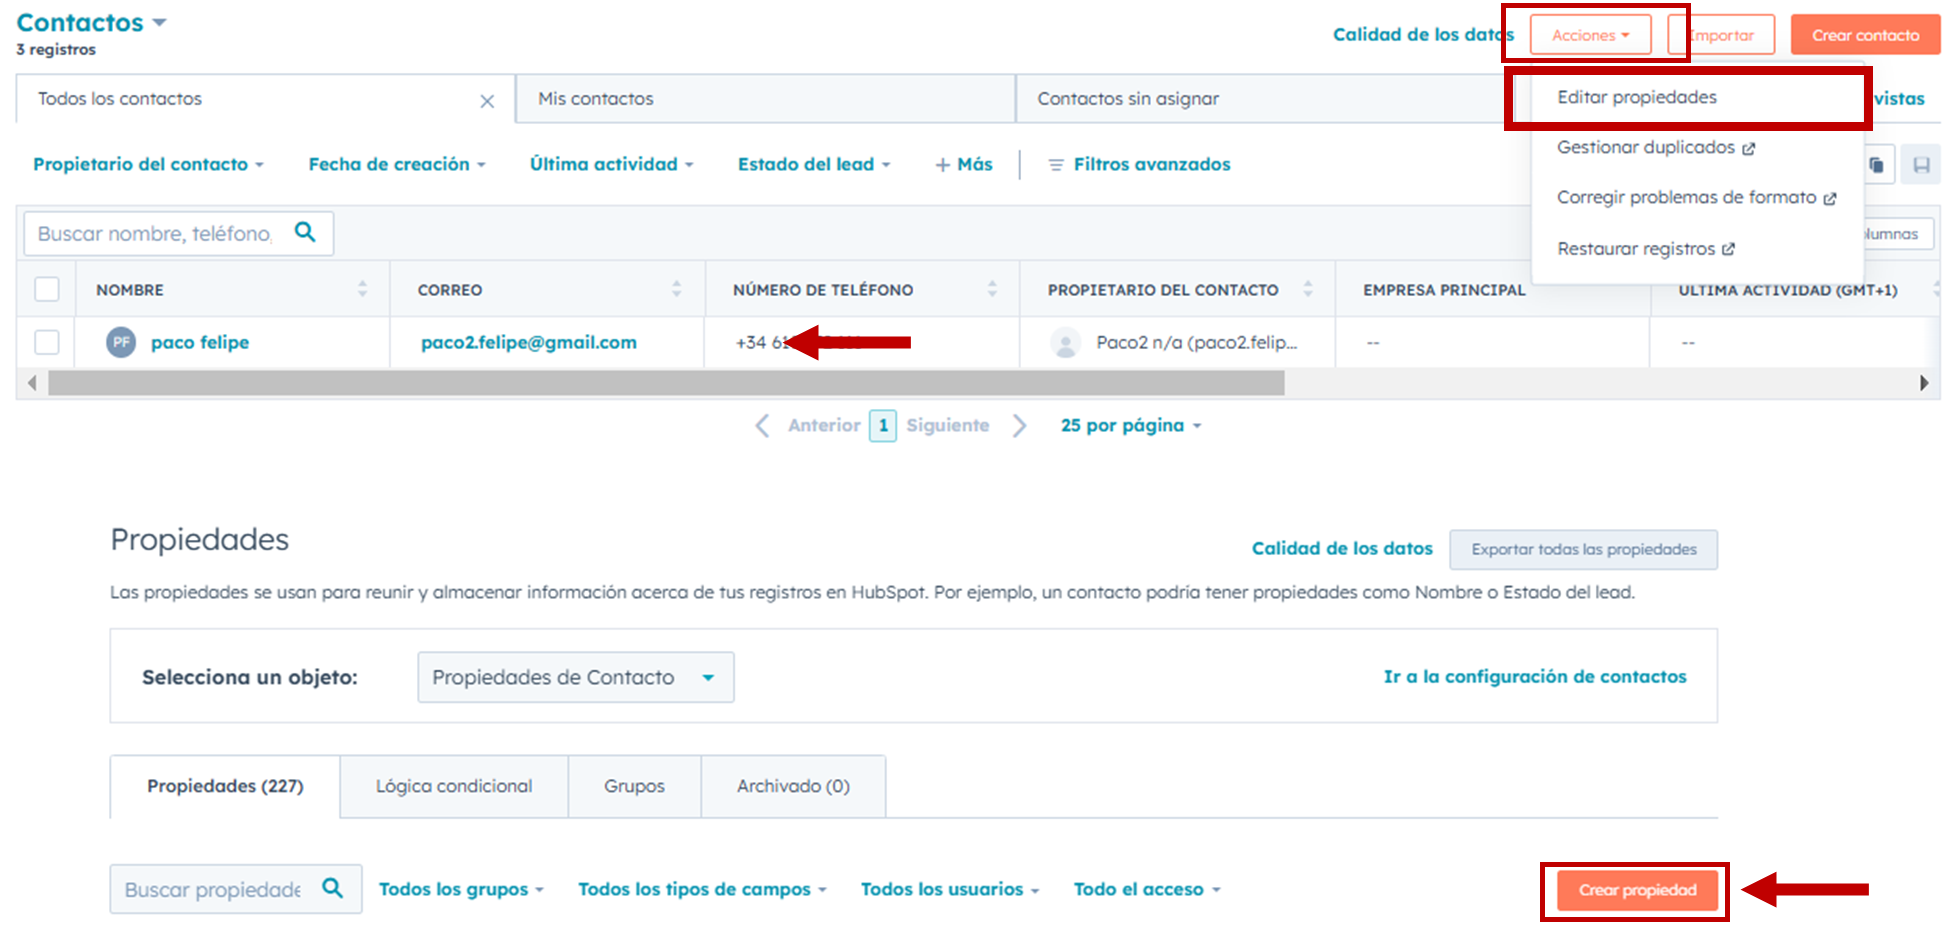
To create a property, go to Contacts / Actions / Edit properties > Create property.
To configure the property, follow these steps:
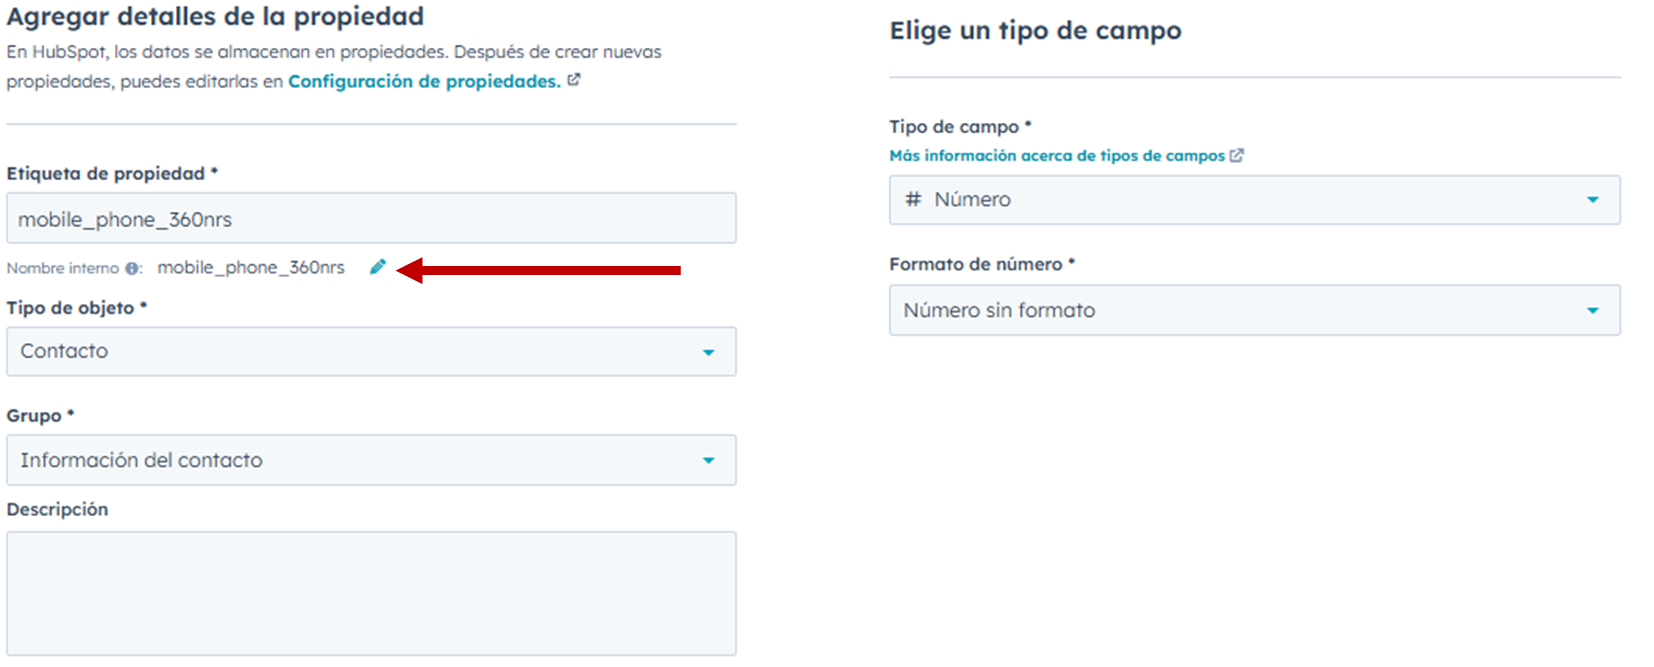
Enter a Label: In the Property Label field, enter an identifying name that will help you easily locate the property later.

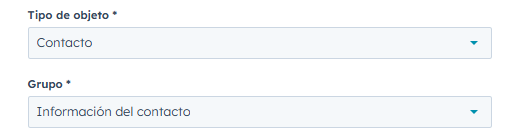
Select the Object Type: Choose the object type you want to create the property on. Note that the property will only be available for that specific object type.
For example, if you want to use the integration in a workflow based on Custom Objects and also in one based on Companies, you'll need to create two separate properties, one for each object type.
In the Label and Description fields, you can enter whatever you want.
In the side menu, click "Field Type" to continue setting up your property.
Under Field Type, select the options: * Number * Unformatted number
Once you've configured these details, click "Create" to finish creating your property. If you'd like to further adjust your settings, you can do so through "Rules" or "Managing Their Access", although this isn't mandatory and won't affect your campaign creation with 360nrs.
To add a value to the created property, follow these steps:
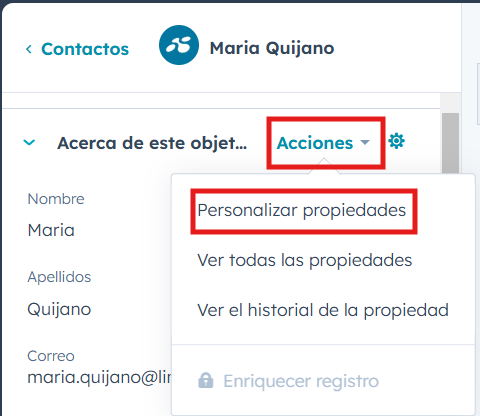
In the object tab for the property, go to the left side menu, click "Actions," and select "Customize Properties."
Click "Add Properties," search for and select the created property. Arrange the properties according to your preference and save the changes.
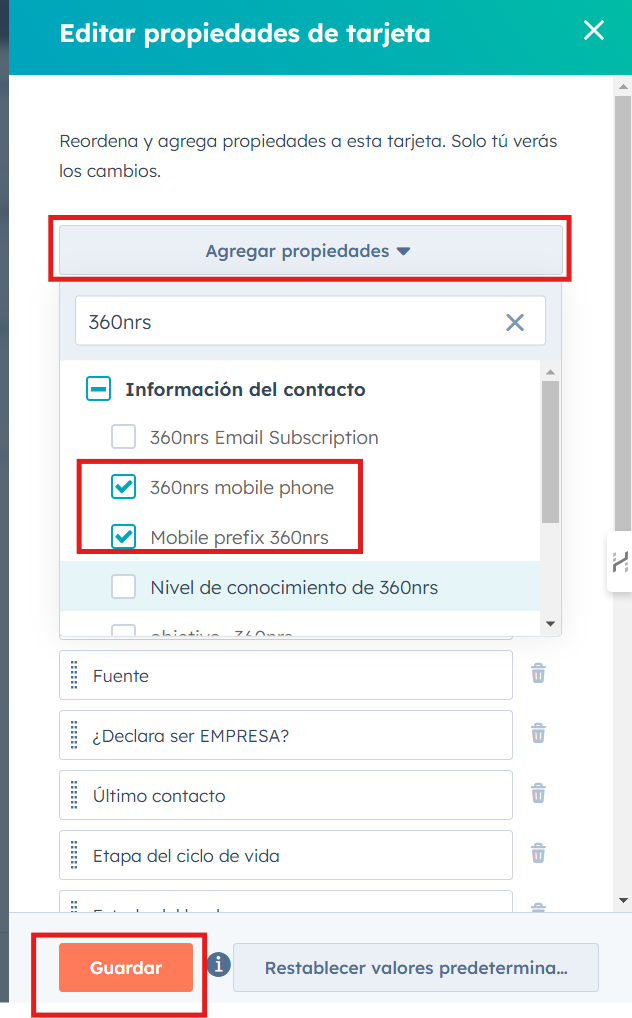
Return to the left side menu on the contact tab, locate the added properties, enter the corresponding data, and save the information.

Once this process is complete, you'll be able to use these fields in your SMS and Voice campaigns.
There are 2 options for sending SMS from HubSpot.
Using the HubSpot CRM Extension, you can send SMS messages through 360nrs directly from each individual contact's profile. Remember: You can only send SMS messages to your marketing contacts.
Before sending your SMS campaign, make sure the contact has a valid phone number to receive messages.
To avoid any inconvenience and ensure proper delivery of your messages, we recommend that you contact our support team at support@360nrs.com before launching your first campaign. We will provide you with all the necessary information on the regulations applicable in each country.
In the contact form you can find the following block:

If you find it more convenient, you can move the order block so that it appears higher.
By clicking the Send SMS button, a small window will open where you'll begin configuring your campaign. The fields you'll need to complete are as follows:
Sender or Referente: Enter the sender of your campaign. The sender is the identifier that appears as the source of the messages in your campaign. It can be of two types:
It's important to choose a clear and representative sender so recipients can easily identify the origin of the message. In some cases, you may need to have previously registered the sender; please contact support@360nrs.com if you have any questions.

Message: Add the message you want to send. Remember that an SMS has a maximum of 160 characters with GSM7 encoding. If special characters, such as accents or symbols, are used, the encoding will be changed to UCS2, reducing the limit to 70 characters. You can concatenate up to 5 different SMS messages, and your customers will receive them as a single one.

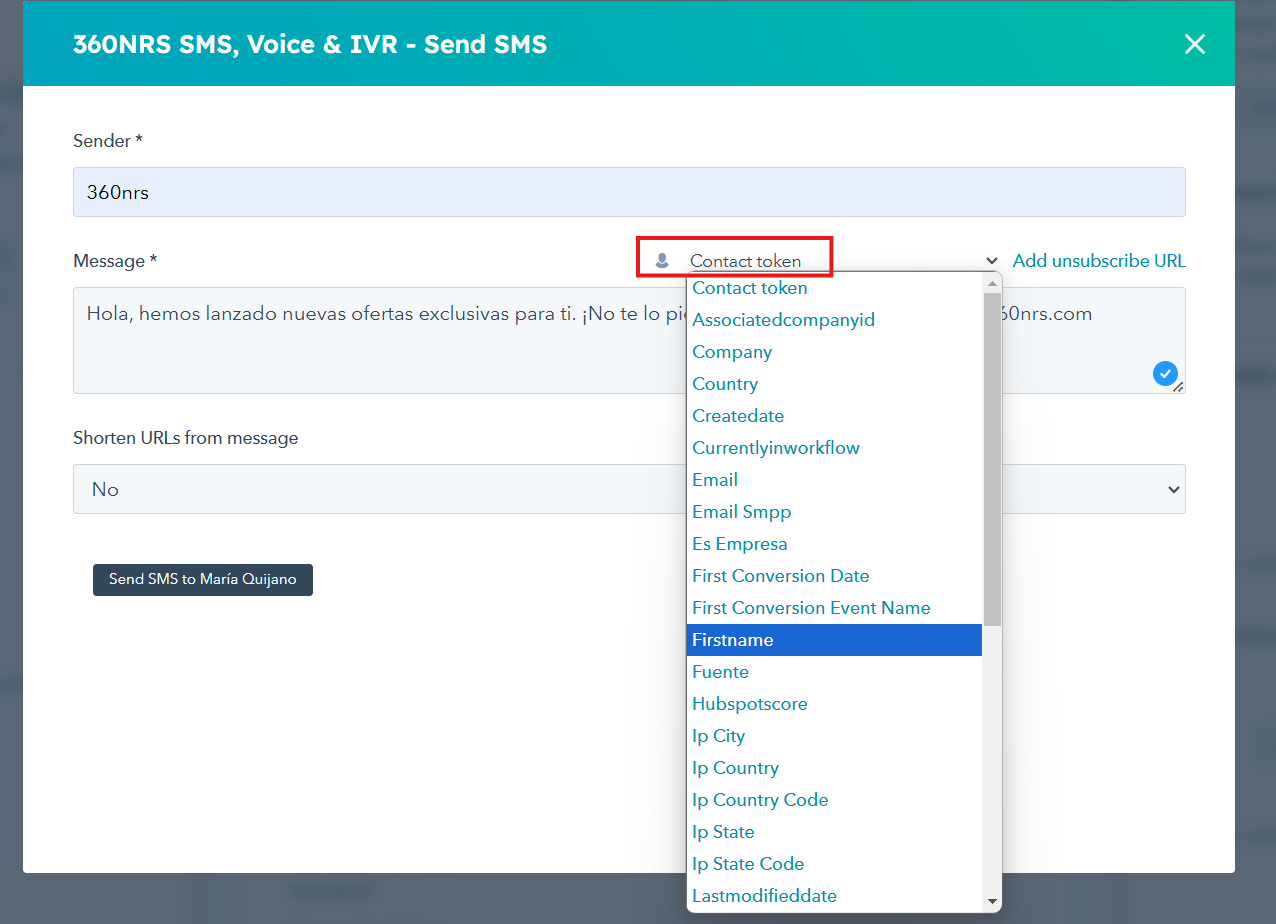
Additionally, you can add custom fields to your message, allowing for personalization based on the recipient and improving the effectiveness of your SMS. To add a custom field, click Contact Token, where you'll see all the properties created in HubSpot. Then, select the custom field you want to include in your message.
Please note that if the contact does not have a value associated with this field, it will not be added to the message.
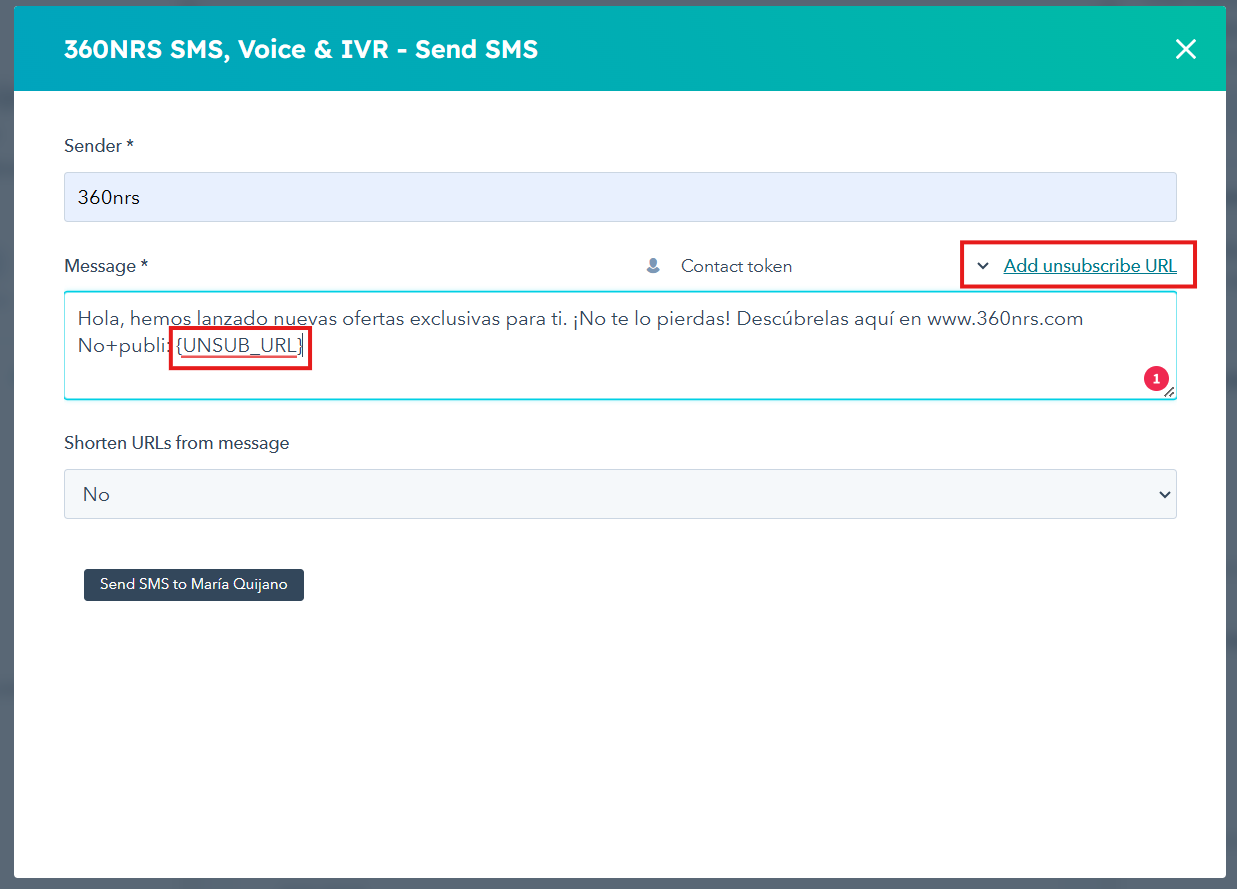
You also have the option to include an unsubscribe URL in your message. To add an unsubscribe link, click "Add Unsubscribe URL," and it will be automatically inserted into your message. When a contact clicks the link, they will be taken to your unsubscribe page, where they will need to confirm their decision to unsubscribe from your communications. Once they confirm their unsubscribe, the system will automatically process their unsubscription.
Please refer to the regulations to find out when your SMS must include an unsubscribe link: Directive 2002/58/EC, Article 13.
With 360nrs, you have the ability to customize your unsubscribe page to suit your needs.
Additionally, if you include a link in your message, the service allows you to shorten URLs in SMS messages. This has its benefits:
Character Limit: SMS messages are limited to 160 characters. Shortening URLs helps save space and allows you to include more information in your message.
Improved Readability: Long URLs can be difficult to read and understand, especially on the small screen of a mobile phone.
Shortening URLs makes the message clearer and easier to understand.
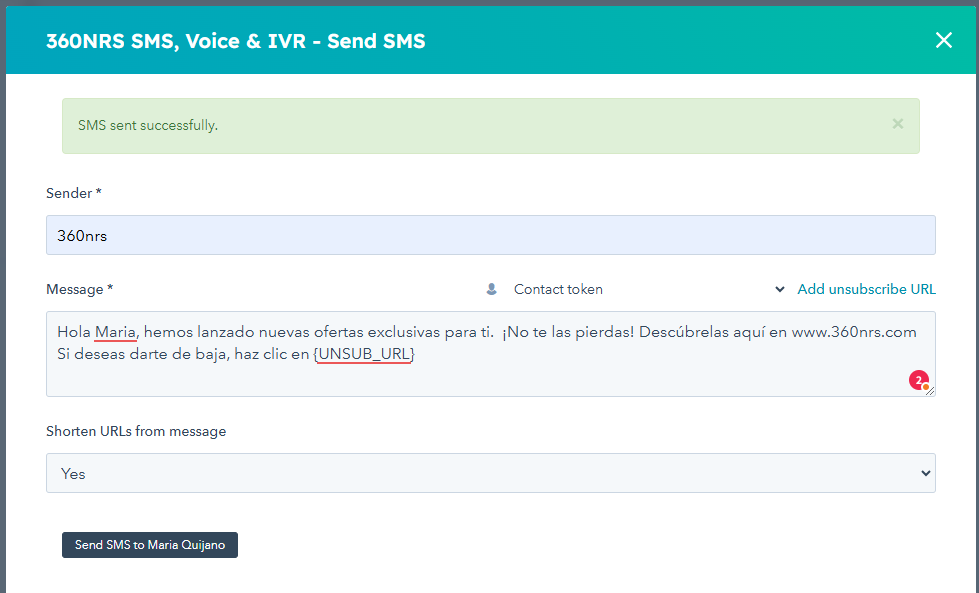
To shorten your URL, simply select "Yes" under "Shorten URLs from message" once you've entered a link. The system will automatically shorten your links by reducing their character count.

Once you've completed your SMS campaign, click "Send SMS to...". If your campaign has been sent successfully, you'll see the message "SMS sent successfully."
A workflow is an automation tool that allows you to create sequences of actions based on predefined rules and conditions. It's used to optimize processes such as lead nurturing, lead nurturing, sales management, and customer communication. You can easily integrate SMS, voice calls, and interactive voice calls (IVR) through 360nrs at any time within your workflow.

You will be able to send your SMS campaign using all available types of Workflows.

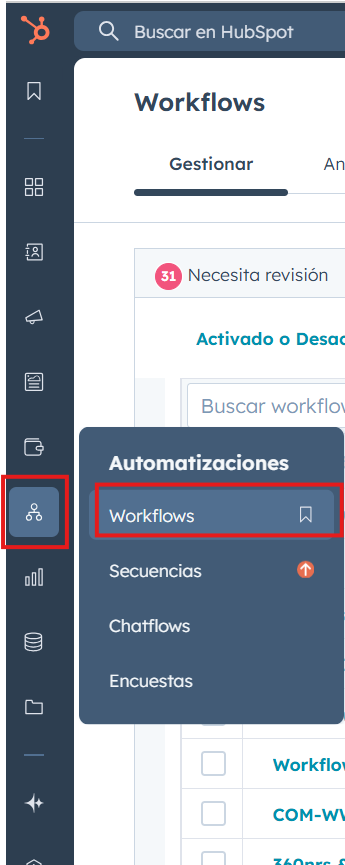
To create a workflow, go to the left-hand menu, select "Automations", then "Workflows". Click "Create workflow", where you can choose between using a template or starting from scratch. You can learn how to create one step-by-step at the following link: Create workflows
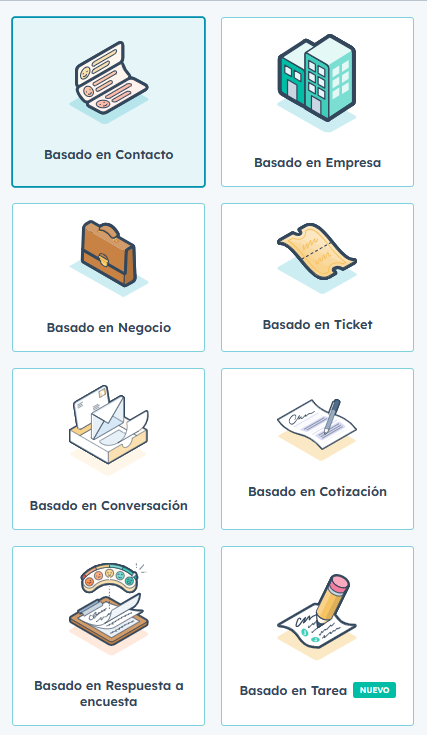
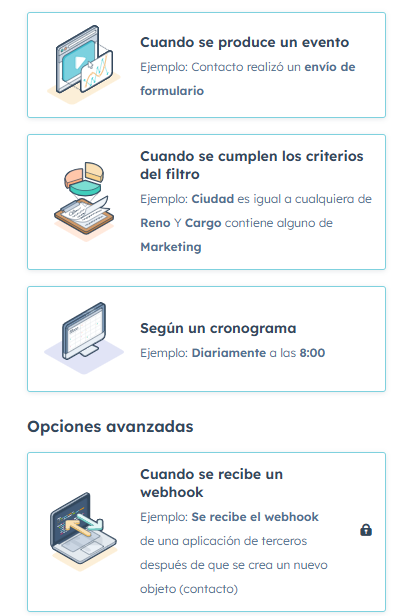
If you create a workflow from scratch, you'll need to define enrollment criteria for contacts to be enrolled. Choose from:
Specific events: When a contact interacts with a specific element, such as a link or button within an email, an automated action can be triggered. Example: A user clicks a button in a promotional email, triggering the automatic sending of an SMS with a unique discount code.
Filter criteria: Segment contacts based on specific attributes and trigger custom actions for each group. Example: If the contact's country is Spain, the workflow can send an SMS in Spanish with an offer specific to that region.
On a schedule: Automate actions at a specific time, without depending on previous contact interactions. Example: Every day, at 8:00 a.m., an SMS reminder is sent to clients with medical appointments scheduled for that day.
Receive a webhook: Allows a workflow to be triggered when an external platform sends information via a webhook. Example: A customer makes a purchase from an online store, which sends a webhook to HubSpot to trigger a workflow that sends an order confirmation message via SMS.
Manual enrollment: Allows a user to manually add contacts to a workflow based on their criteria. Example: A sales team identifies potential customers interested in a product demo and manually enrolls them in a workflow to receive reminders and informational materials by email or SMS.
This ensures that the workflow is triggered under the desired conditions.
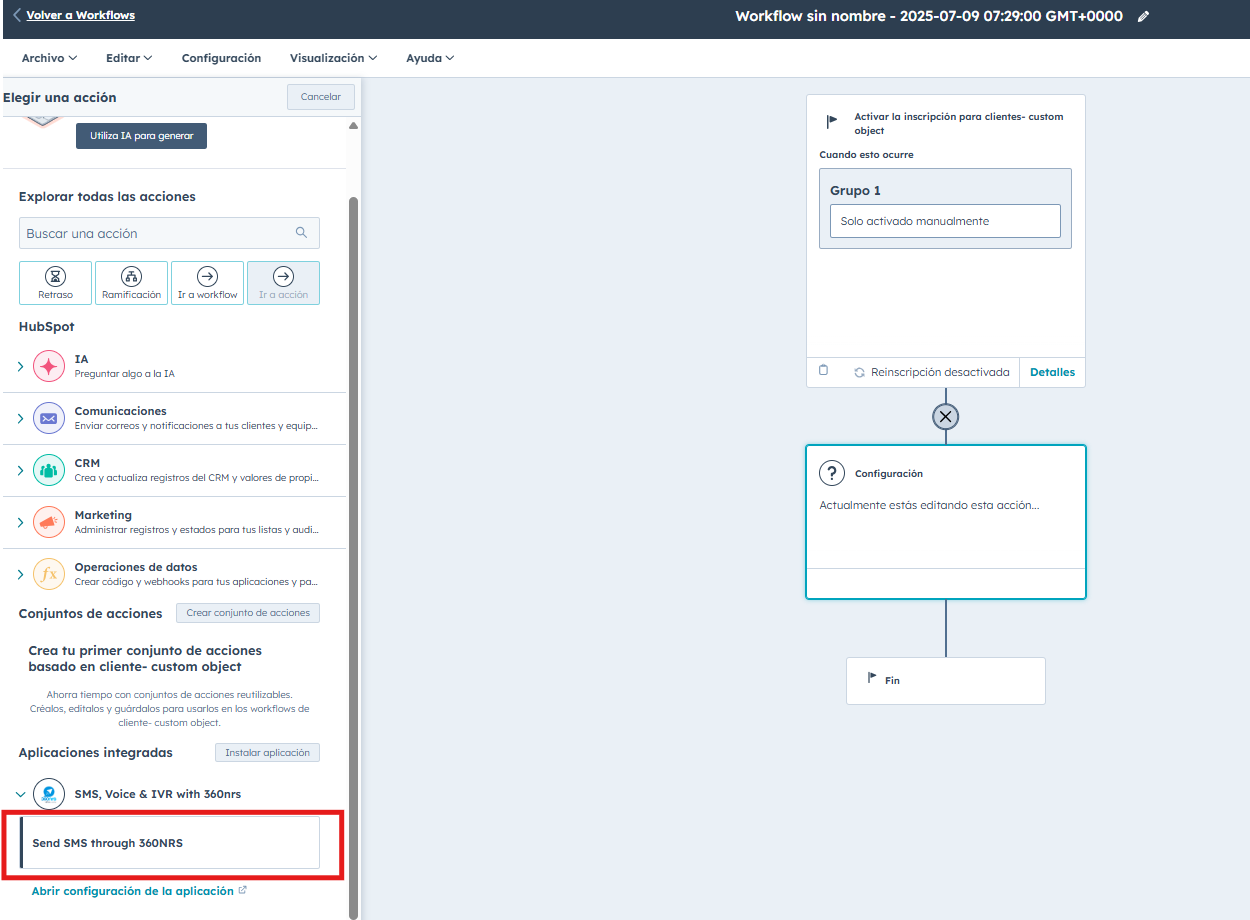
**To add a send SMS action to your workflow, follow these steps:
Click the "+" icon.

In the left-hand drop-down menu, select "Integrated Apps".
Search for and select the "360nrs" integration, then "Send SMS through 360nrs".
Now, it's time to configure your campaign:
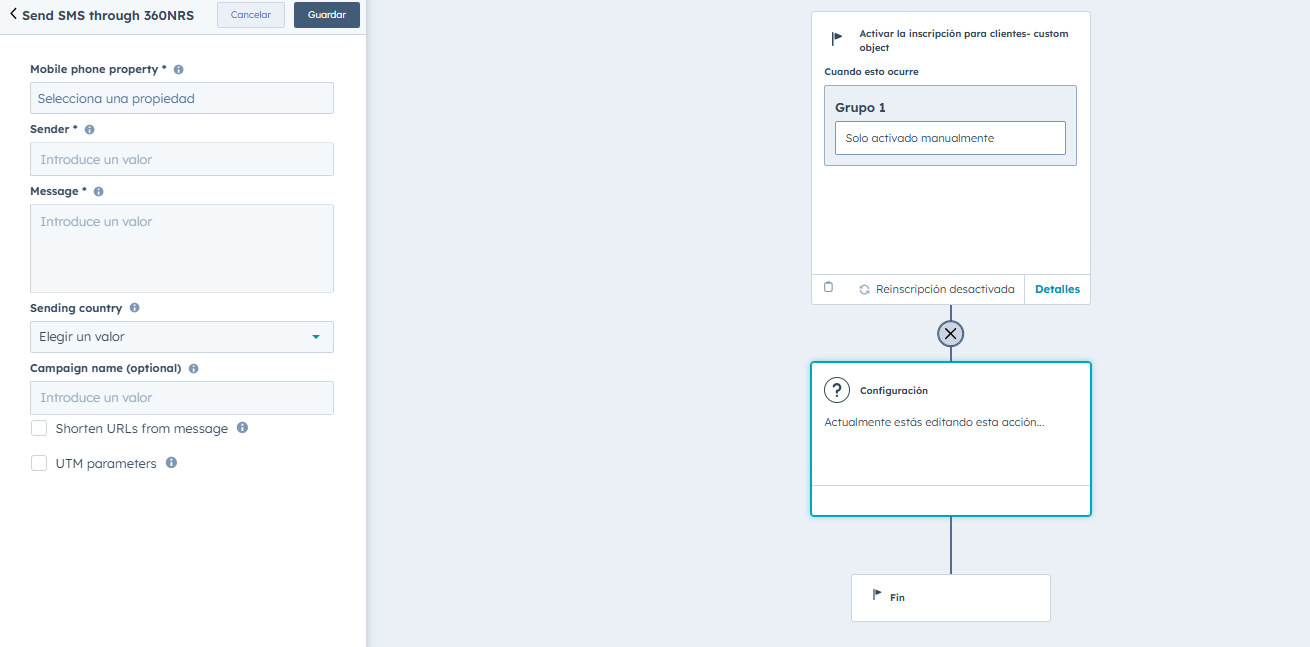
Mobile phone property: Select the property that contains the phone number to which you want to send the SMS campaign. It's important to note that only mobile phones will receive it.
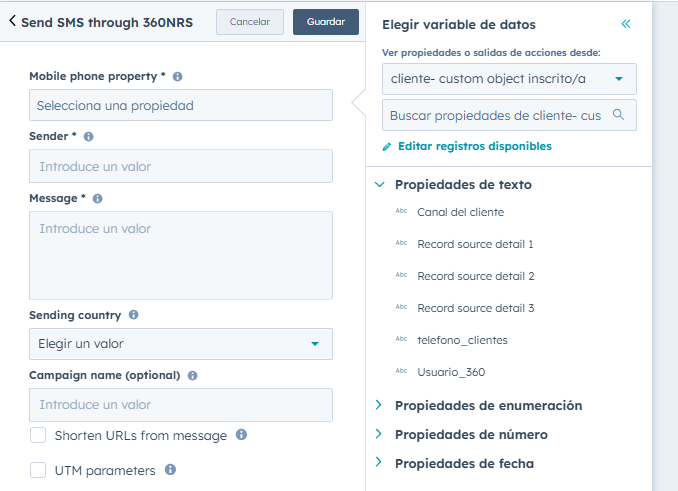
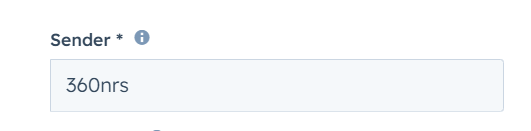
Sender: Enter the sender of your campaign. The sender is the identifier that appears as the source of the messages in your campaign. It can be one of two types:
Numeric: Composed only of digits, with a maximum length of 15 characters.
Alphanumeric: Can include letters and numbers, with a limit of 11 characters.
It's important to choose a clear and representative sender so that recipients can easily identify the origin of the message.
Message: Add the message you want to send. Remember that an SMS has a maximum of 160 characters with GSM7 encoding. You can concatenate up to 5 different SMS messages, and your customers will receive them as one.
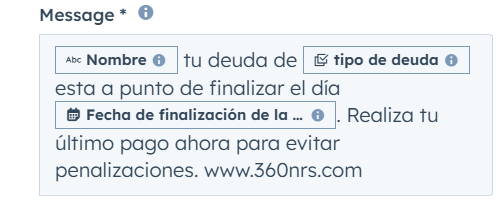
Additionally, you can add custom fields to your message, allowing for personalization based on the recipient and improving the effectiveness of the SMS. To add a custom field, select the custom field you want to add from the tab on the right. If the contact doesn't have a value associated with that field, it won't be added to the message.

You also have the option to include an unsubscribe URL in your message. To add an unsubscribe link, include {UNSUB_URL} in the text, and a link will be automatically generated for recipients to unsubscribe. When a contact clicks on the link, they will be directed to your unsubscribe page, where they will need to confirm their decision to unsubscribe from your communications. Once they confirm their unsubscribe, the system will automatically process their request, and they will no longer receive SMS messages from your company.
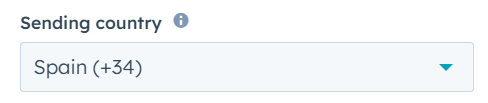
Select the recipient country for your SMS: If the international prefix is not present, it will be added automatically before sending. If the country you are looking for is not listed, please contact the 360nrs support team.
Decide if you want to shorten URLs. Additionally, if you include a link in your message, the service allows you to Shorten URLs in SMS messages. This has several benefits:

Add a name to your campaign. Although it's optional, it will help you identify it more easily and improve organization.

Assigning a name will allow you to quickly locate it within the 360nrs platform. If you don't enter a name, the campaign will automatically be grouped under the workflow name.
Adding a name to your campaign will also allow you to more easily branch out based on the status of your sends.
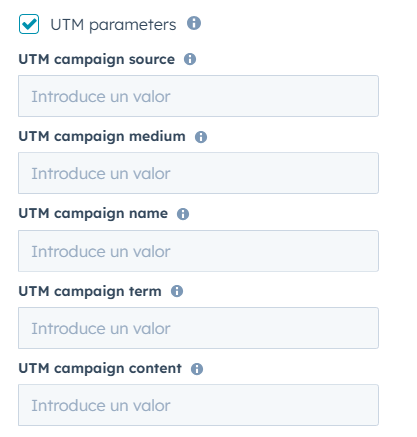
Optionally add UTM parameters to the URLs in your message to track the performance of your campaigns. This will allow you to analyze the traffic generated, understand the source of clicks, and optimize future strategies. Remember that if you don't activate the URL shortening option, this will consume additional characters. You'll need to configure the UTM by completing the various fields.
Once you've finished configuring your Workflow, click "Review and Publish" to activate it and put it into action. You'll need to decide whether you want to include only eligible contacts in the workflow after activating it or also those who already meet the requirements at that time. You can deactivate and edit the workflow at any time.

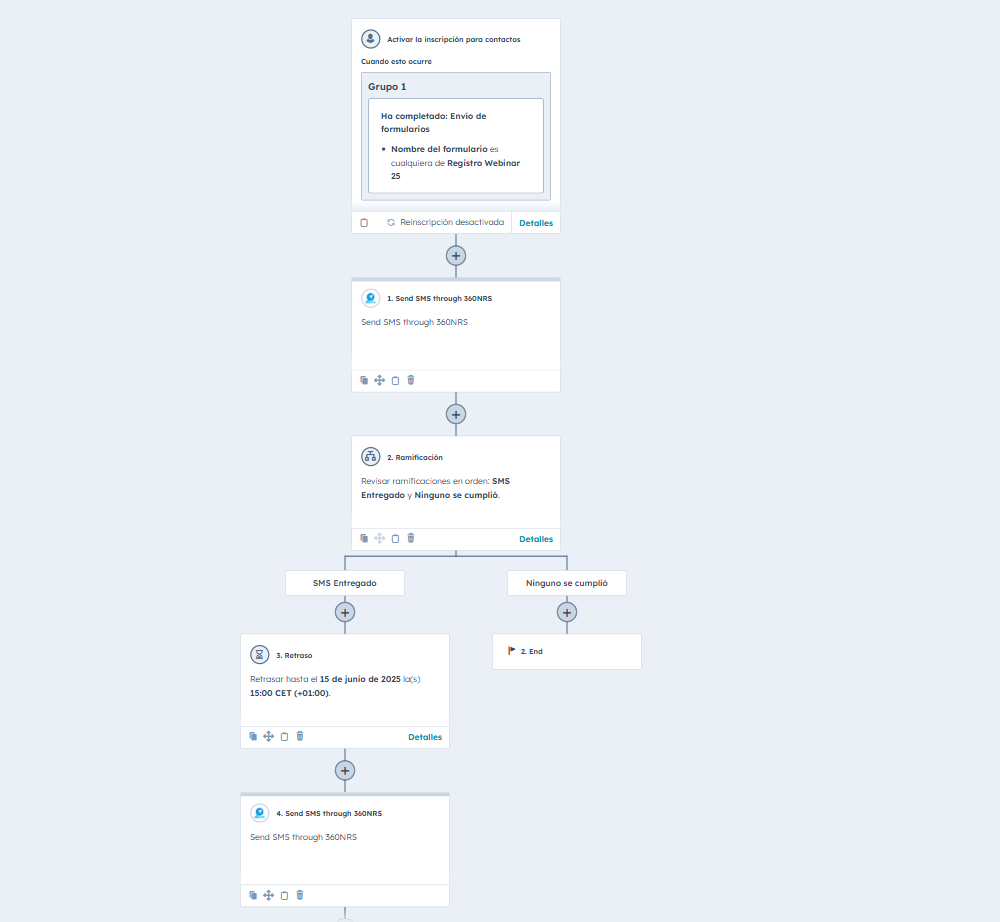
In workflows, you can set up automated actions based on the status of your campaign, optimizing engagement with your contacts and improving the effectiveness of your emails.
For example, you can schedule a new send specifically targeted to those people who received an SMS but didn't click on the link, ensuring strategic follow-up.
This feature allows you to re-engage users precisely, increasing conversion opportunities and improving your campaign's response rate. Additionally, you can combine different channels and actions within the workflow to further personalize each contact's experience.
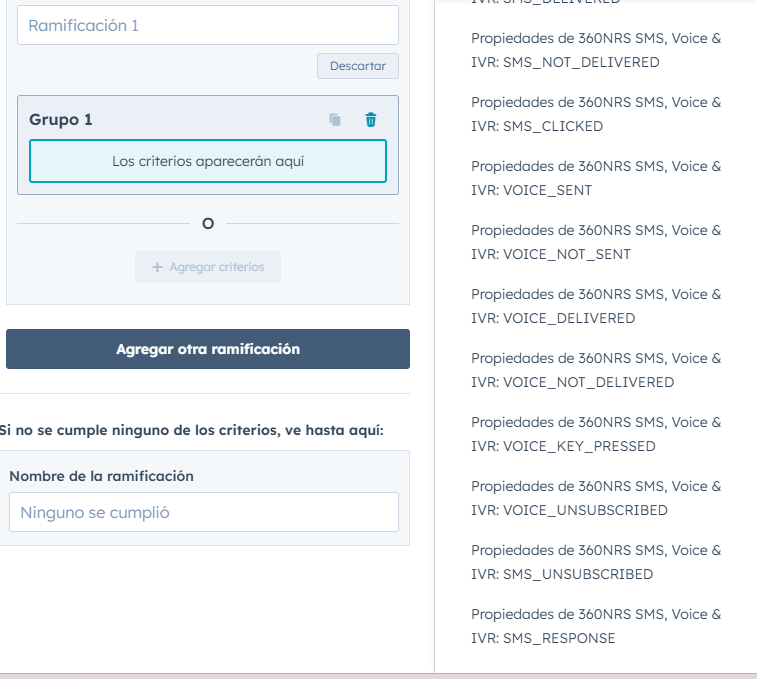
To do this, click on "Add branch".
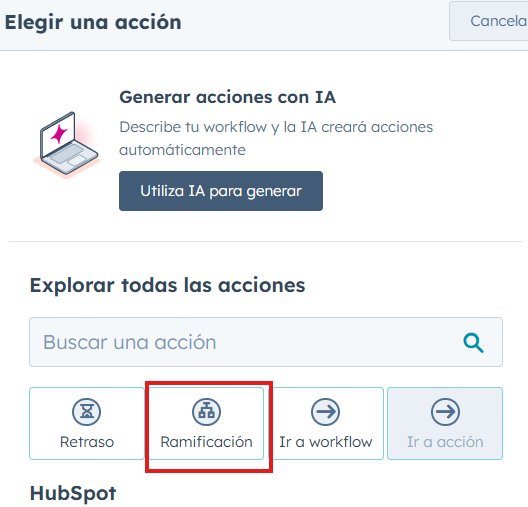
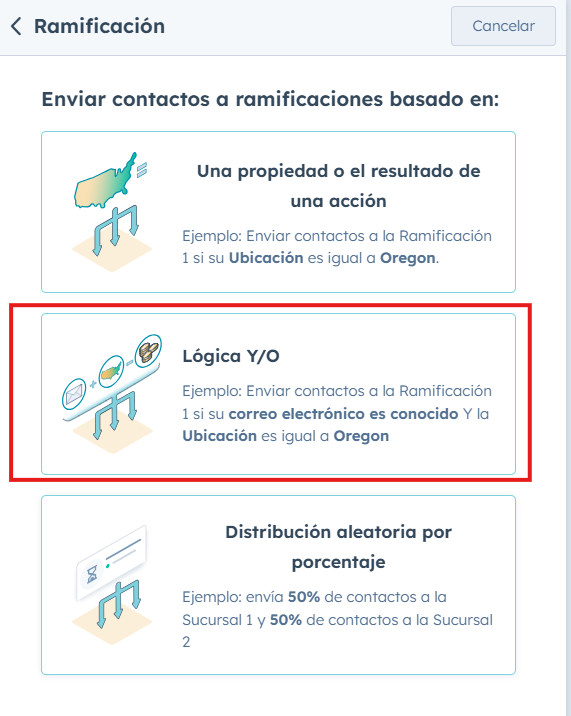
Select a branch based on "AND/OR Logic".
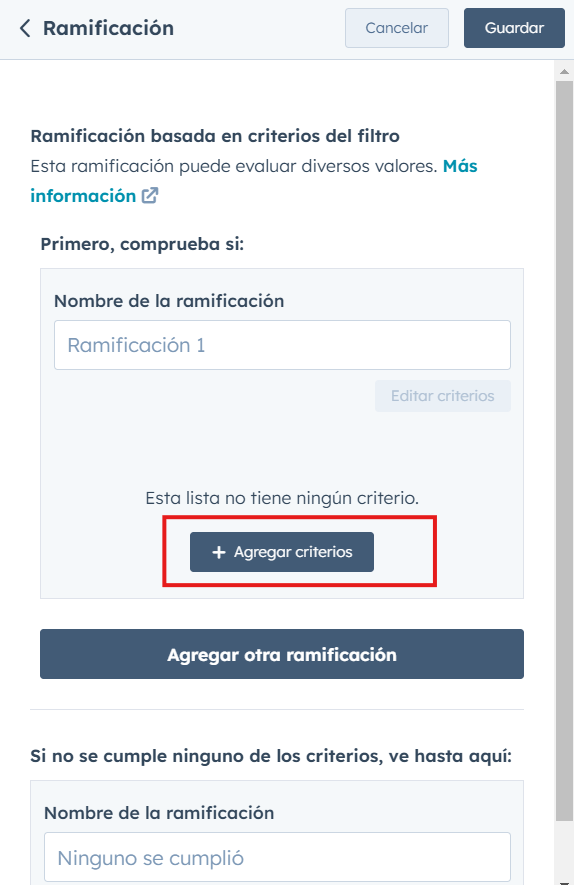
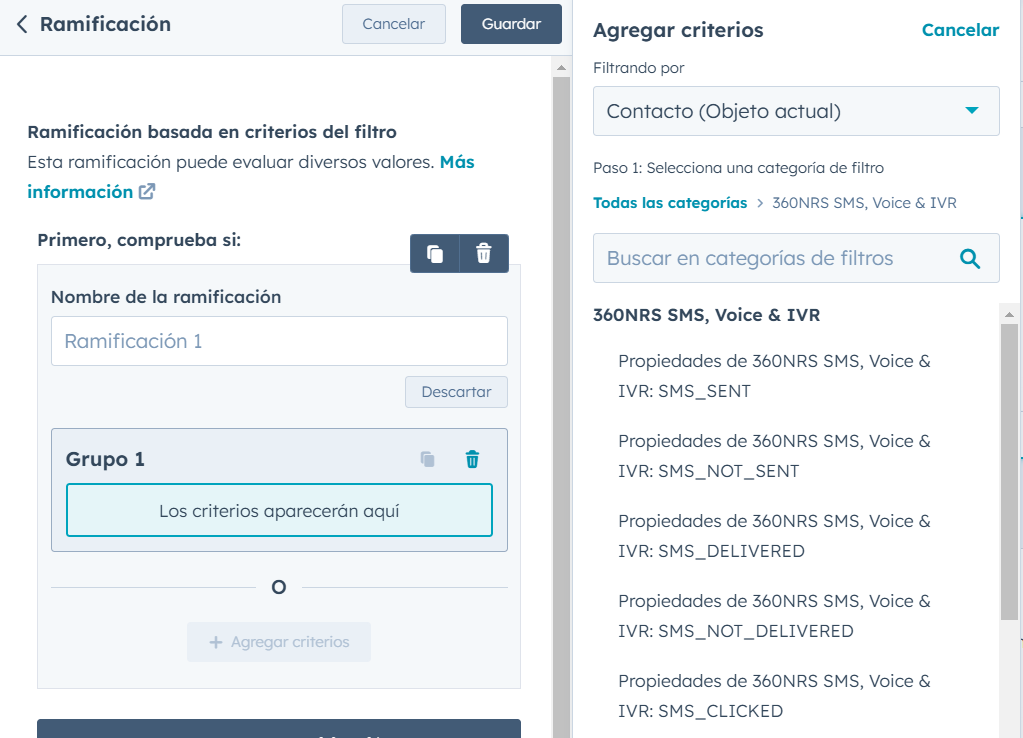
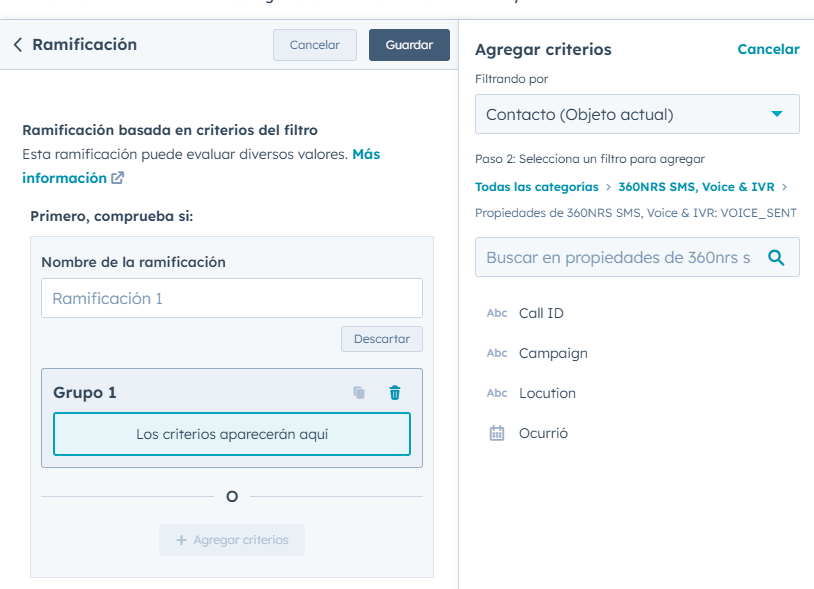
Click "add criteria" and under Integration Filters, choose 360nrs.
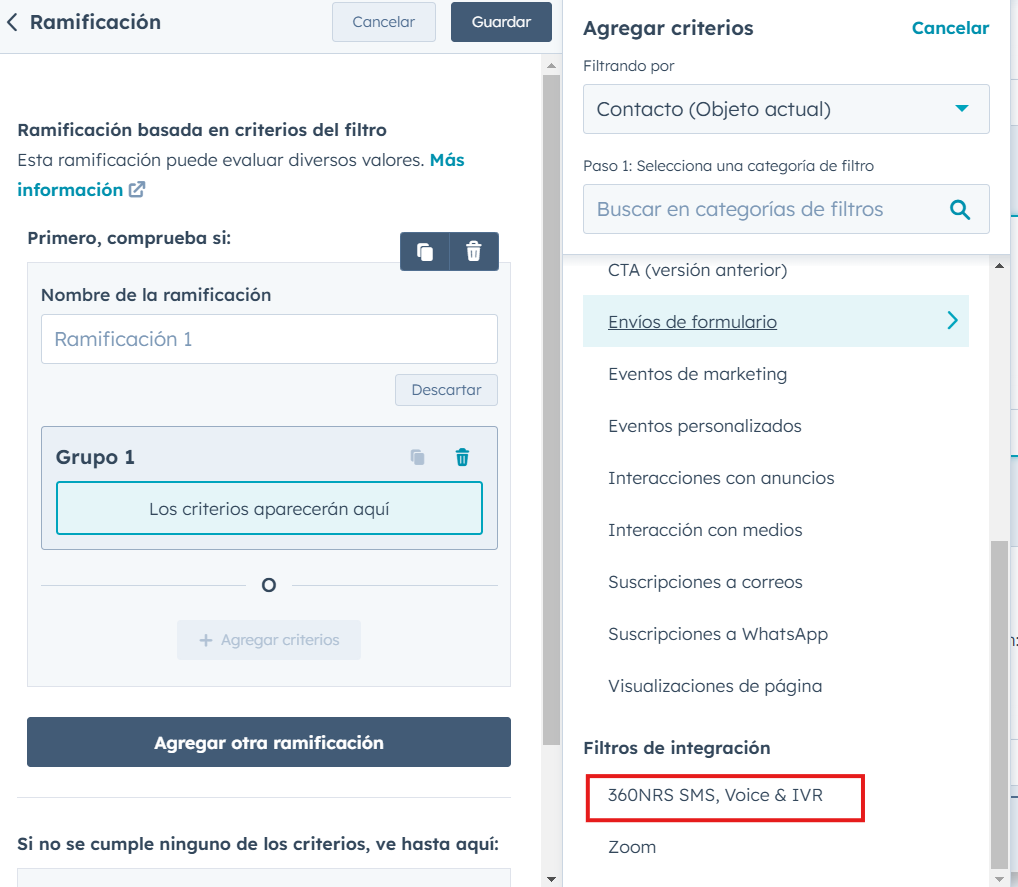
Select the criteria on which you want to act:
SMS_NOT_SENT (SMS not sent)
SMS_DELIVERED (SMS delivered)
SMS_NOT_DELIVERED (SMS not delivered)
SMS_CLICKED (If the SMS contains a link, the customer has clicked)
Define the time at which the action will be applied. This step allows you to define which campaign, time, or message you want to apply the previously selected filter to, ensuring that the selected filter is applied precisely to a specific message within the workflow.
By configuring this option, you can set the context in which the automated action will be executed, preventing it from being applied to unrelated campaigns or messages.
To do this, select one of the following criteria:
To complete the setup, you need to define the relationship between the condition and the corresponding value, which will allow the filter to be applied correctly in the automation.
Choose the appropriate option depending on how you want to compare the data. Some of the available options include:
Depending on the condition chosen, enter the value with which the information will be compared. This can be:
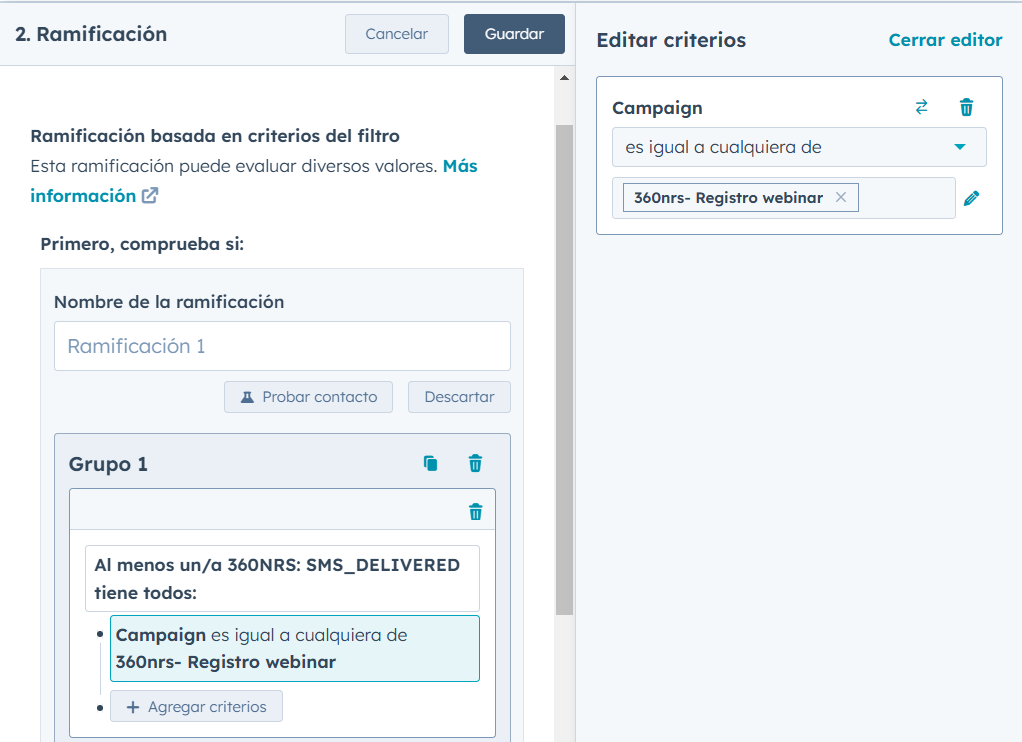
Once you've selected the condition relationship and assigned the corresponding value, click Save to apply the changes.
This will ensure that the automation will only trigger when the established criteria are met, ensuring that actions are executed accurately within the workflow.
You can configure new actions for each branch of the workflow, allowing you to customize the flow based on contact behavior.
In addition, you have the option to add delays to:
Postpone the execution of actions and allow time for contacts to interact before applying the next action.
Schedule the action at a precise time, ensuring it is performed at the most opportune moment within the automation.
This allows you to optimize your strategy and ensure that each action occurs at the right time to maximize campaign effectiveness.
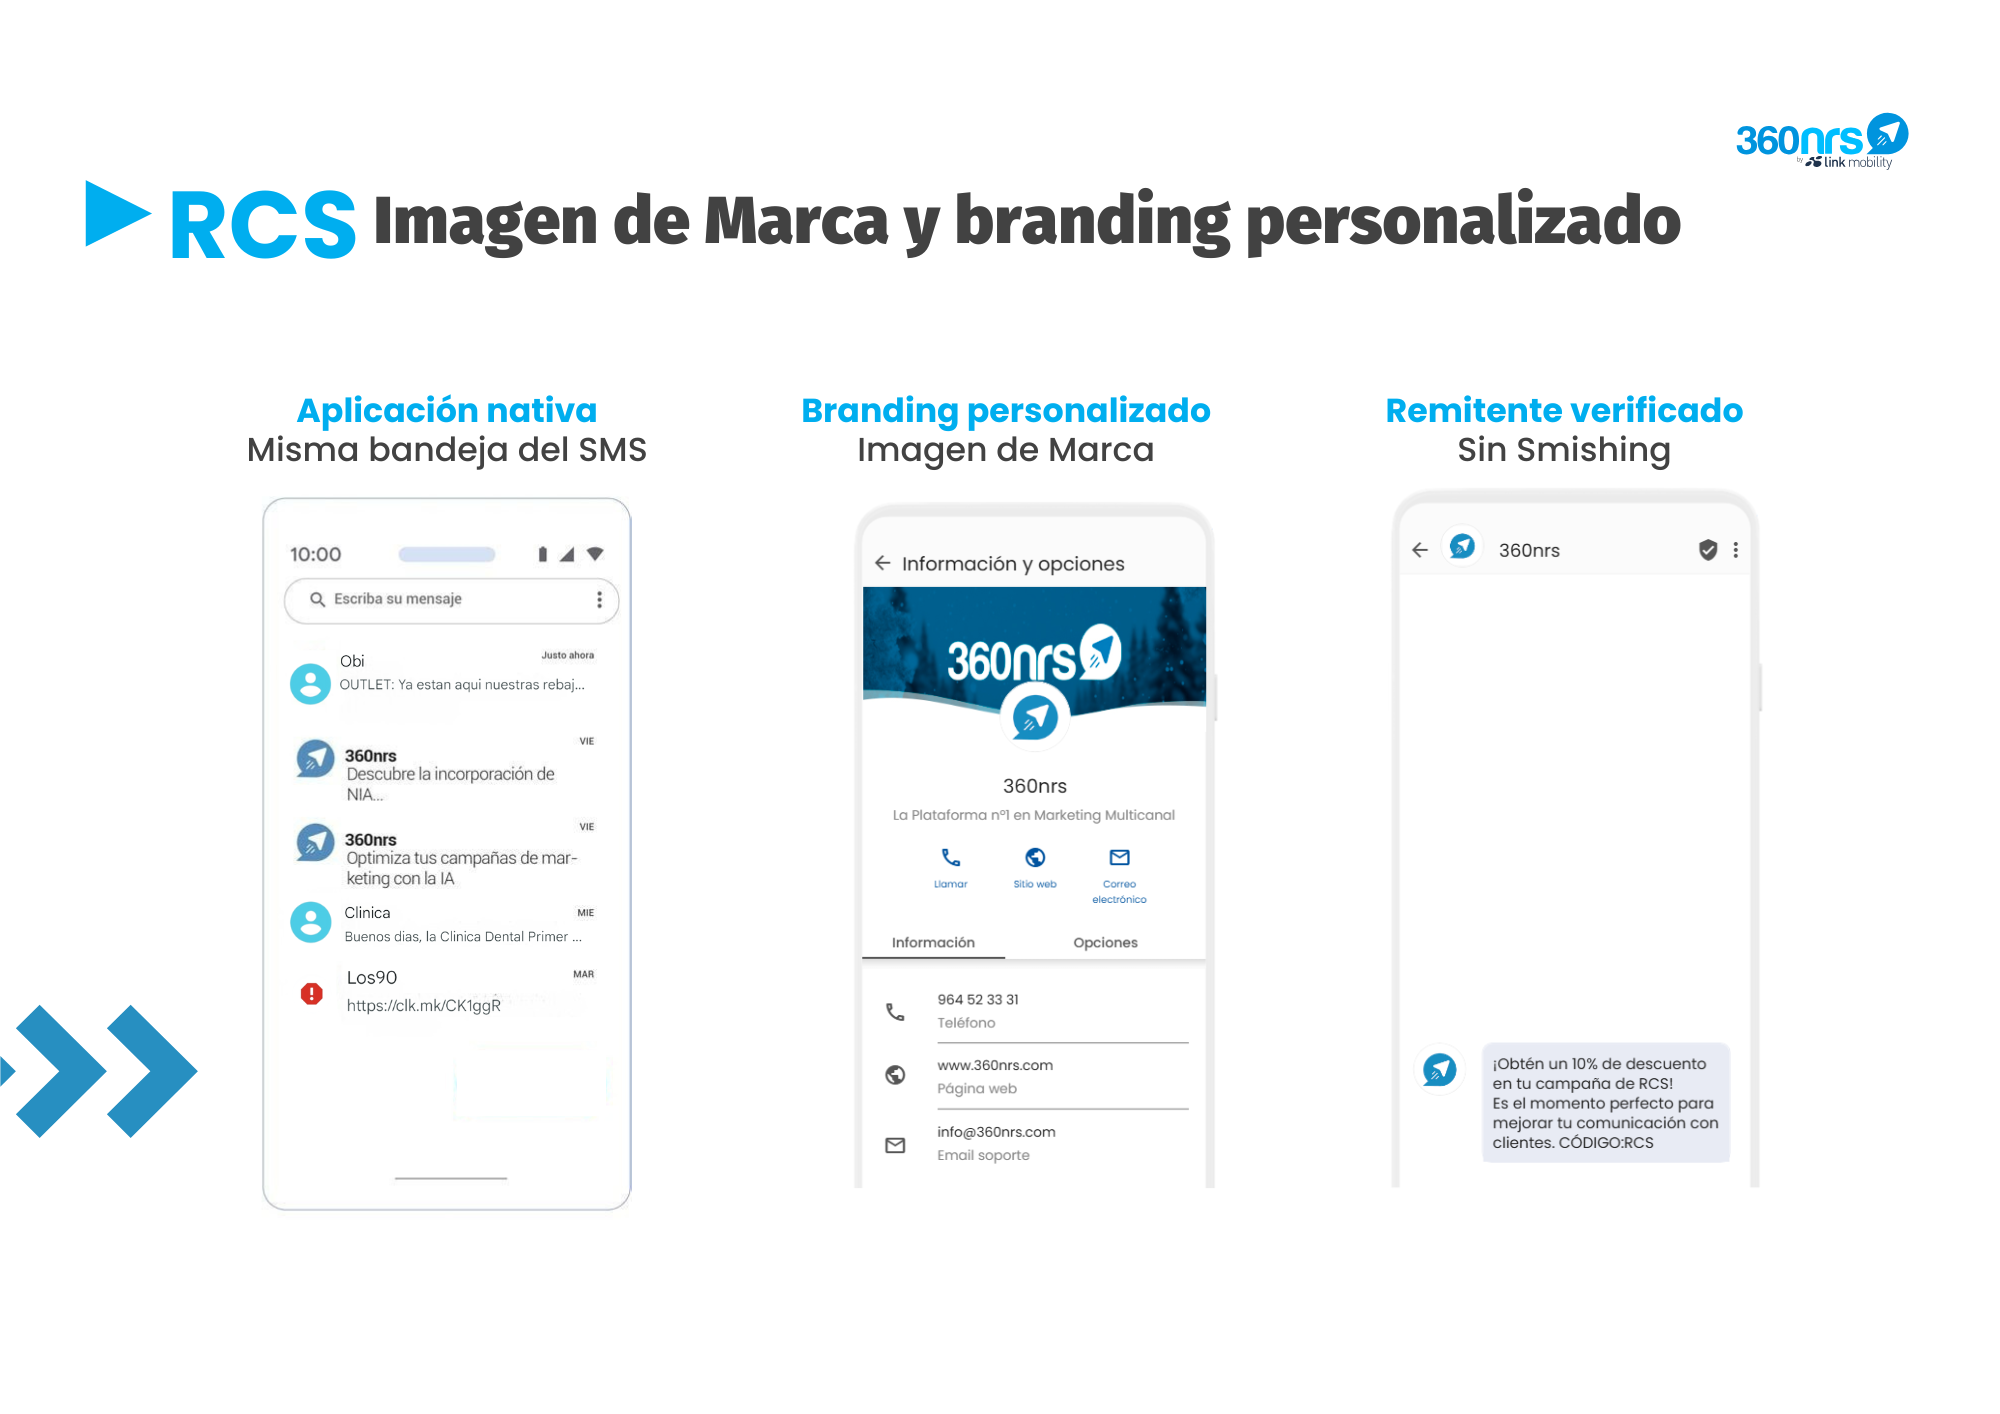
RCS messages are the evolution of SMS, allowing native messaging on mobile phones with a richer, more interactive experience. They also offer an additional layer of security for each message, including sender authentication, end-to-end encryption, and brand verification, ensuring that messages come from trusted sources.
These features increase user confidence when interacting with company communications, encouraging greater engagement through the native messaging channel. These features provide greater user confidence when interacting with company communications, encouraging users to interact confidently through the channel. They also offer advanced statistics such as read rates.
RCS messages integrate directly into the native SMS inbox, offering a seamless experience for users. Currently, most recent Android devices already have RCS support. Additionally, Apple began rolling out RCS support for iPhones in 2024, with the release of iOS 18. Although RCS messages are not yet supported on all devices, if a contact cannot receive an RCS message, it will automatically be converted into an SMS, ensuring it always reaches its recipient.
With RCS messages, you'll boost your brand. RCS allows you to customize messages with logos, colors, and brand names, strengthening your visual identity and improving brand perception with every interaction.
Businesses can create their own profile, adding details such as a description, address, hours, or any other valuable information for the customer.
Unlike SMS, RCS messages are limited to 160 characters, with no concatenation allowed, and can only be sent from a verified sender. If your message exceeds this limit, it will be automatically sent as an SMS to ensure delivery.
To register your sender and start sending RCS, you must contact our support team at support@360nrs.com. They will guide you through the verification process.
Once your sender is verified, you can send your RCS campaign from the SMS sender, either through workflows or the CRM extension. This will allow you to manage your sending easily and efficiently. The only difference is that you must ensure that the messages do not exceed 160 characters and use your verified sender.
Timelines are used to display each of the events that occur in HubSpot.
When you send SMS through 360nrs, either through a Workflow or the CRM extension, the following events and statuses may occur:
| EVENTS |
|---|
| SMS SENT |
| SMS NOT SENT |
| SMS NOT DELIVERED |
| SMS CLICKED |
| SMS UNSUBSCRIBED |
| SMS RESPONSE |
| SMS NOT DELIVERED |
| SMS NOT DELIVERED |
| STATES |
|---|
| SMS SENT > SMS DELIVERED |
| SMS SENT > SMS DELIVERED > SMS CLICKED |
| SMS SENT > SMS DELIVERED > SMS UNSUBSCRIBED |
| SMS SENT > SMS DELIVERED > SMS RESPONSE |
| SMS SENT > SMS NOT DELIVERED |
| SMS NOT SENT |
This means that for an SMS to be DELIVERED or UNDELIVERED, it must first be SENT. Therefore, two events will appear in the Timeline.
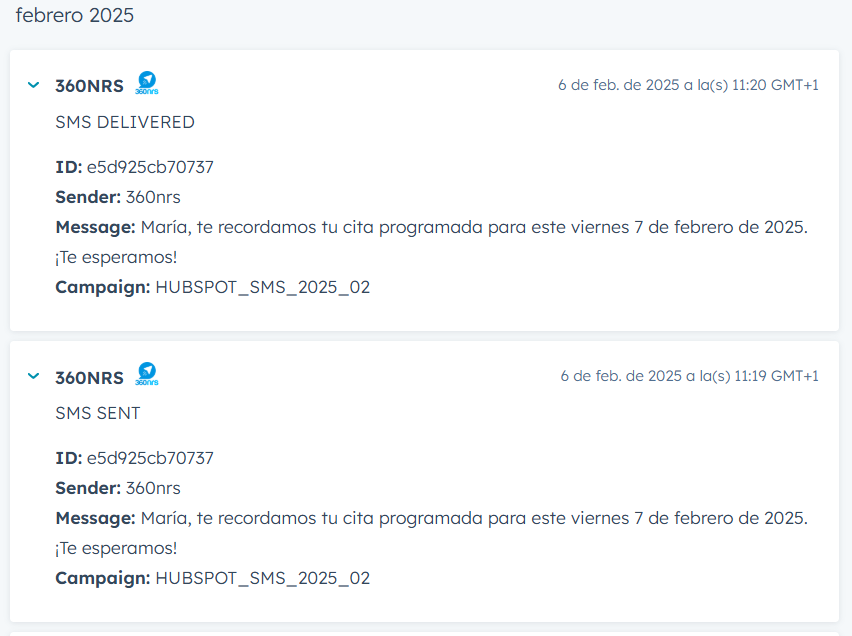
Timeline example, SMS DELIVERED.

(You can see more details by clicking):
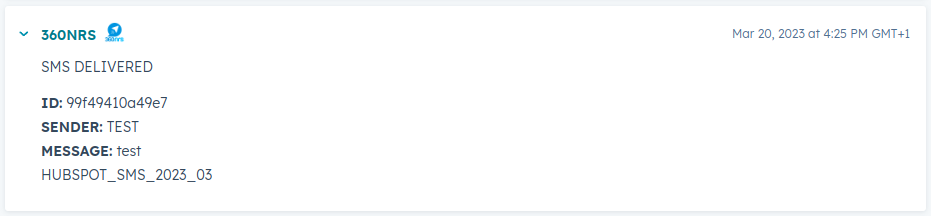
The ID that appears just above the sender is the SMS ID in 360nrs. If you have any issues, you can contact 360nrs support (support@360nrs.com) and provide that ID.
Whether you send messages from the CRM extension or from a Workflow, each SMS event, whether SENT, NOT SENT, DELIVERED, or NOT DELIVERED, will appear in the contact's Timeline.
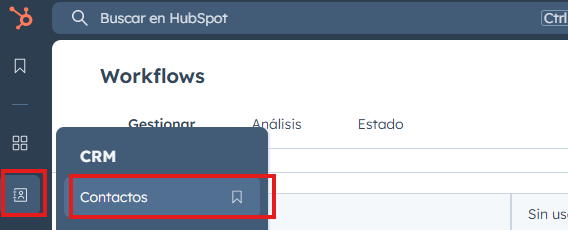
To check the status of your campaign, go to the "Activities" tab in the "contact" tab.
Then, under "Filter Activities," make sure "360nrs" is selected. If this option is unchecked, the statistics won't be displayed.
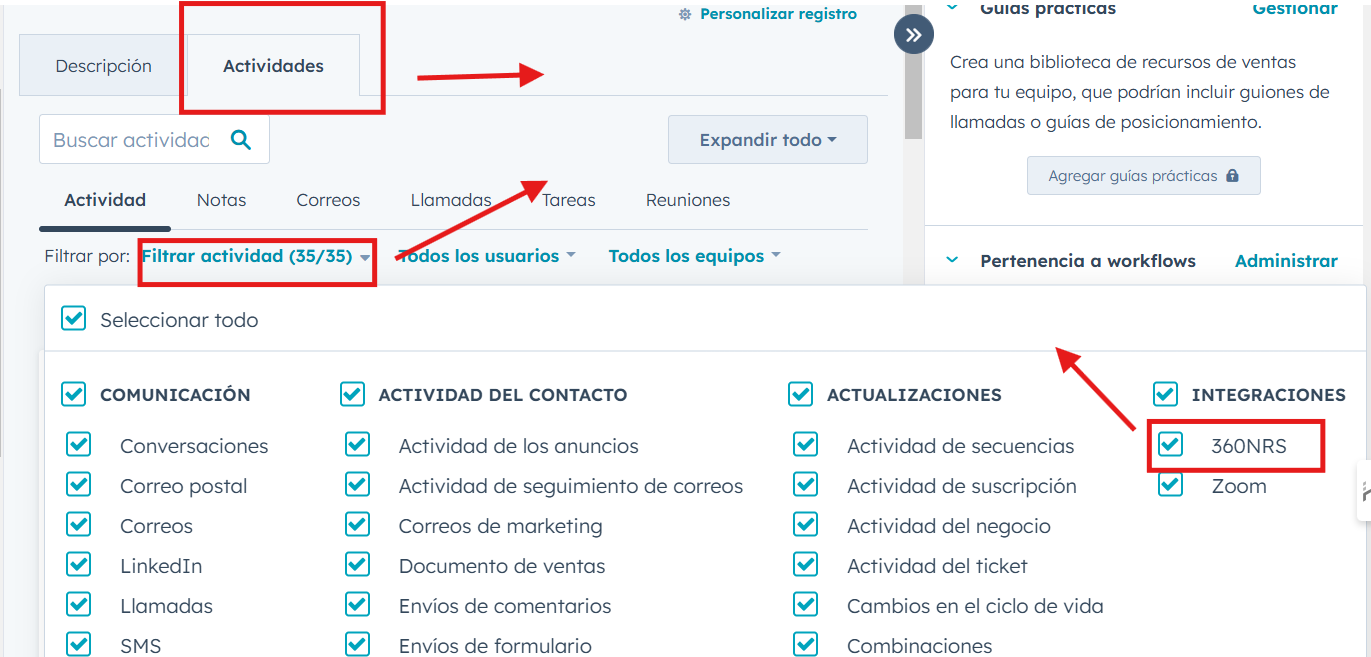
Once you complete this step, the campaigns will appear in the "Activity" section. A new activity will be created based on the campaign's status.
Once you've activated your workflow, you'll be able to monitor its performance, allowing you to:
Analyze the effectiveness of each action and evaluate whether contacts are moving correctly through the flow.
Identify possible improvements in automation to optimize response and conversion rates.
Detect blockages or drops in interaction, adjusting strategies to improve follow-up.
Segment contacts based on their behavior, facilitating decision-making for future campaigns.
Reviewing your workflow performance will help you adjust and optimize your strategy, ensuring that each action is executed at the right time and with the right audience.
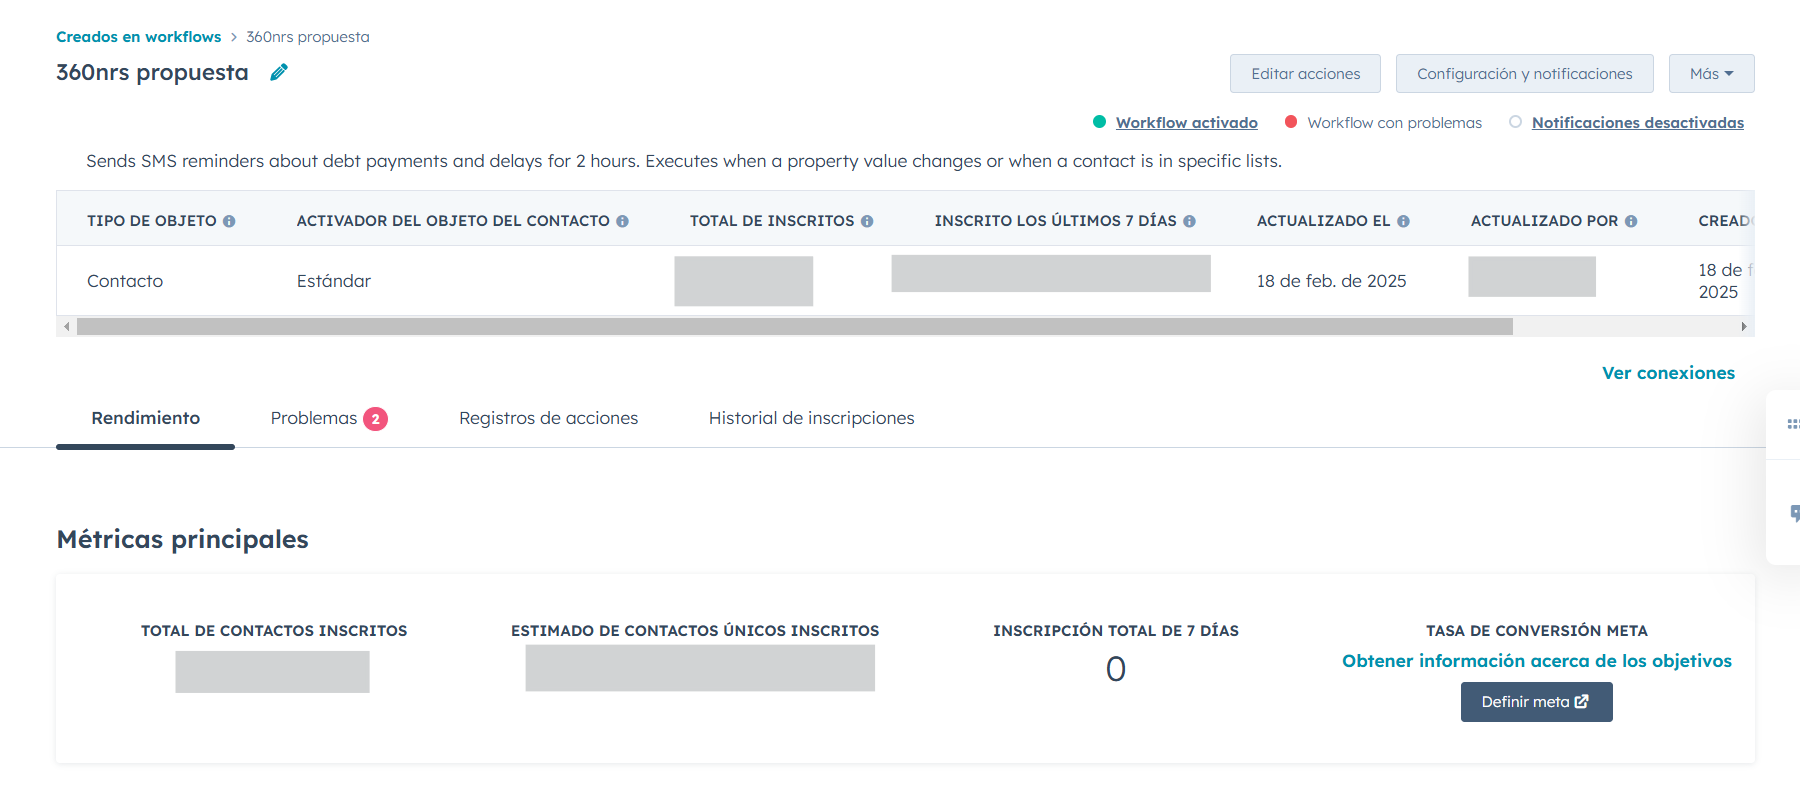
To check the performance of your workflow, go to the workflows page under automations. Click the name of the workflow you want to check to see its performance.
In the top left menu, go to the "Display" tab and click "Performance".

From this section, you can analyze your workflow's performance in detail, reviewing key metrics that will help you evaluate its effectiveness and make adjustments if necessary. You'll see when contacts have enrolled in workflows, any issues that have occurred, and in the "Action Logs" section, you can filter by specific actions to check the status of your SMS campaign.
To do this, select "Send SMS through 360nrs" under Action Type. If you wish, you can limit the timeframe.

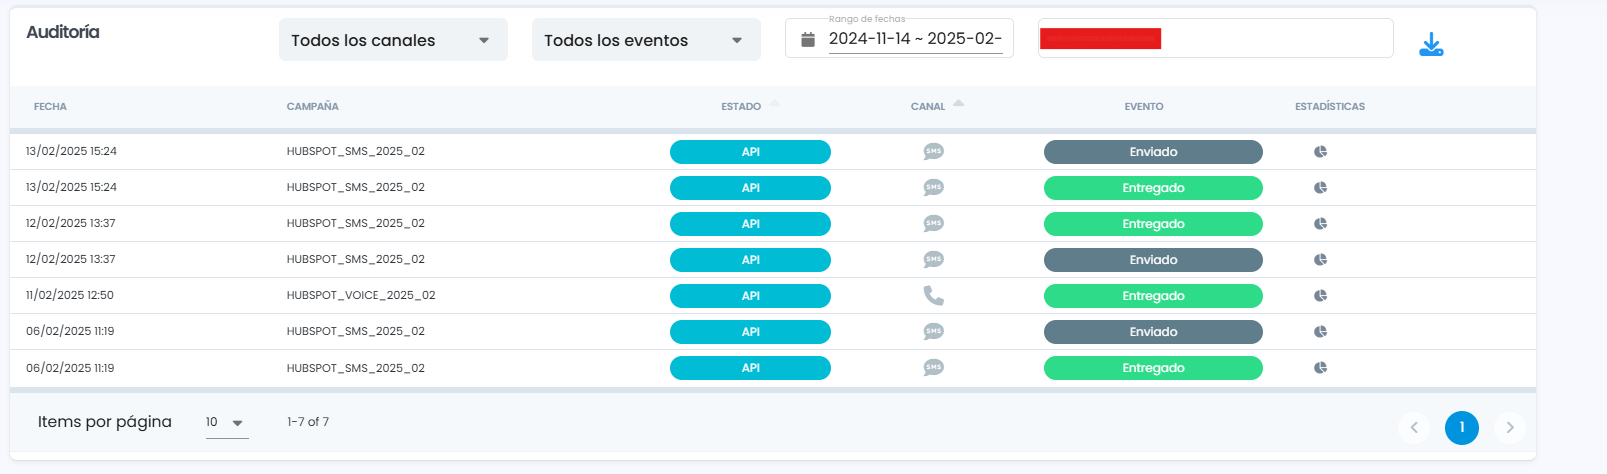
Una vez envíes tu campaña desde HubSpot, podrás consultar estadísticas detalladas en la plataforma 360nrs. Estas campañas aparecerán con el estado "API".
Los envíos realizados a través de la sección CRM Extensión se agruparán mensualmente bajo el siguiente formato: HUBSPOT_{CHANNEL}_CRM_{YEAR}_{MONTH}
En el caso de campañas sin nombre enviadas desde un workflow, el formato será: HUBSPOT_{CHANNEL}_WORKFLOW_{WORKFLOW_ID}
En estas estadísticas se incluirán todos los mensajes enviados durante el tiempo de vida del workflow correspondiente.
Por ejemplo: HUBSPOT_SMS_CRM_2018_12

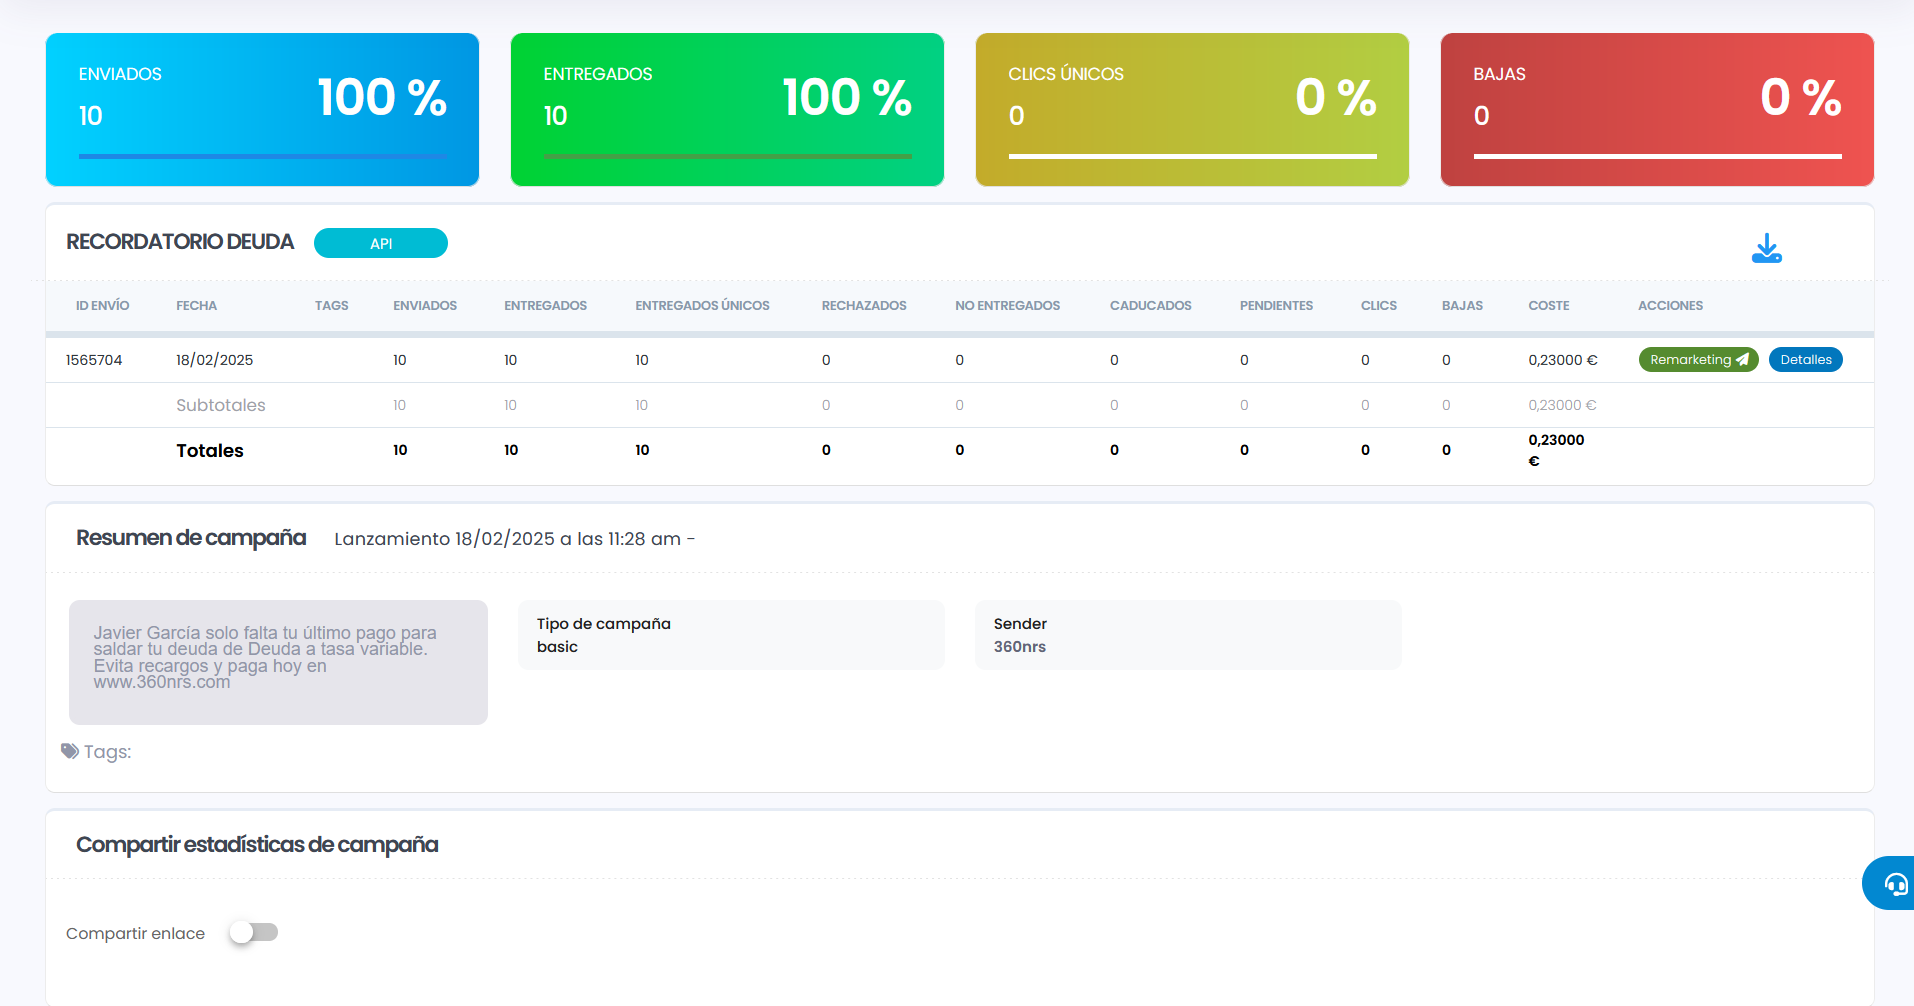
Ejemplo de campaña sin nombre, enviada a través de un workflow.

Si la campana tiene un nombre personalizado, se mostrará por separado con el nombre que hayas asignado.

Para consultar los detalles de tus envíos, haz clic en el botón de estadísticas en Acciones.

Verás la siguiente información:
Además, se mostrará un resumen con información relevante sobre la campaña, incluyendo:
Puedes compartir las estadísticas de tu campaña con otros usuarios a través de un enlace, permitiéndoles visualizar los resultados sin necesidad de acceder a tu cuenta de 360nrs. Para hacerlo, simplemente marca la opción "Compartir enlace", y la plataforma generará automáticamente un enlace único que podrás copiar y enviar a quienes desees. De esta manera, otros usuarios podrán consultar las métricas detalladas de la campaña de forma rápida y sencilla.

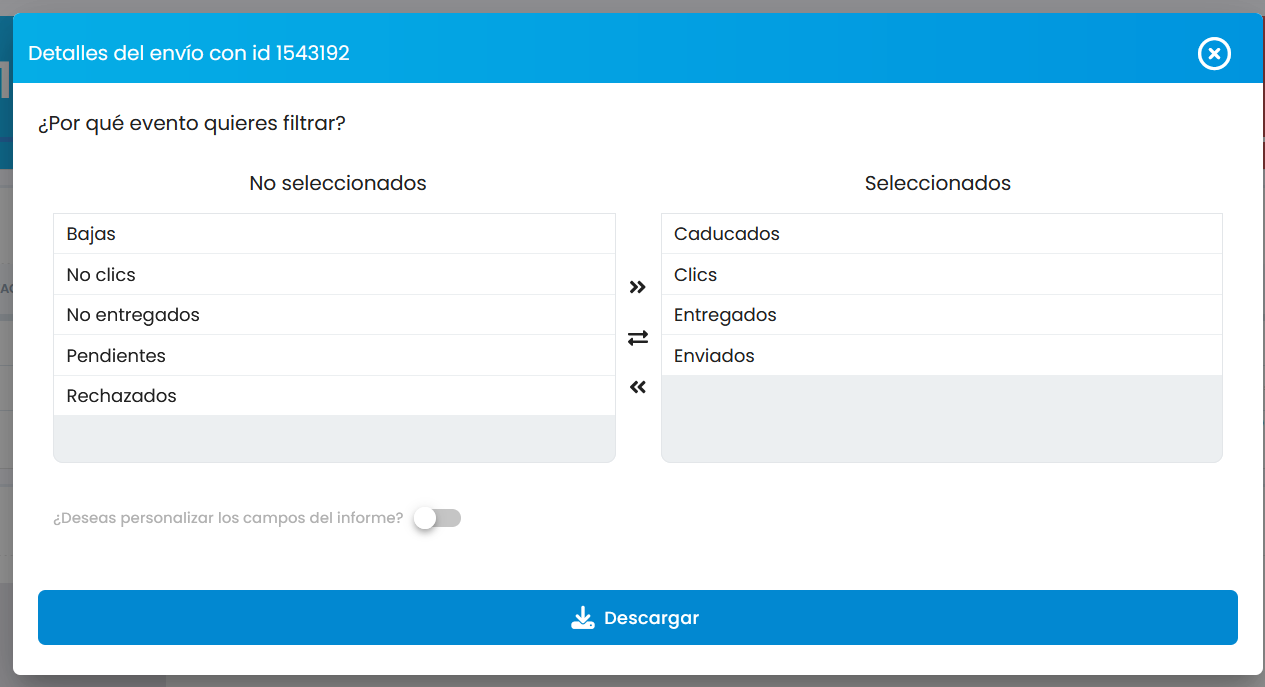
En caso de que la campaña se muestre como una agrupación, verás un resumen de todos tus envíos realizados. Si deseas conocer el estado específico de cada envío, haz clic en Detalles, filtra por el evento o los eventos que deseas consultar y podrás descargar un archivo CSV con la información.

360nrs también te permite realizar remarketing a tus contactos. Solo tendrás que hacer clic en el botón de remarketing para volver a impactar a tus contactos.

Podrás seleccionar el evento o los eventos con el que deseas contactar nuevamente a los destinatarios y crear una nueva campaña de manera sencilla. Los eventos disponibles son los siguientes:
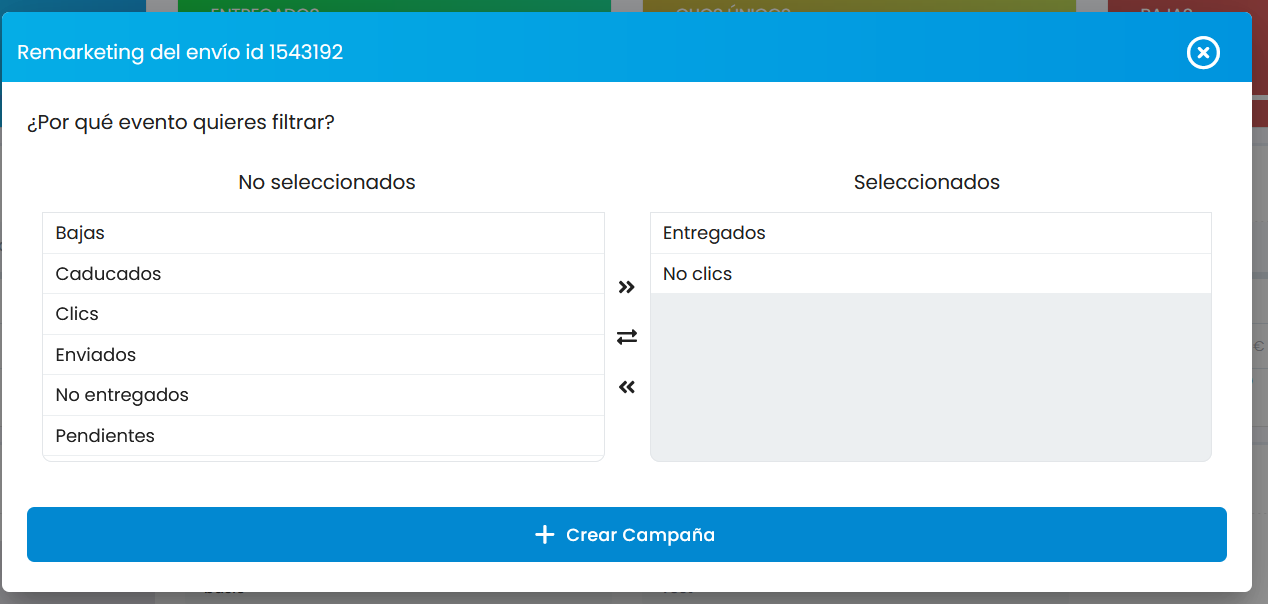
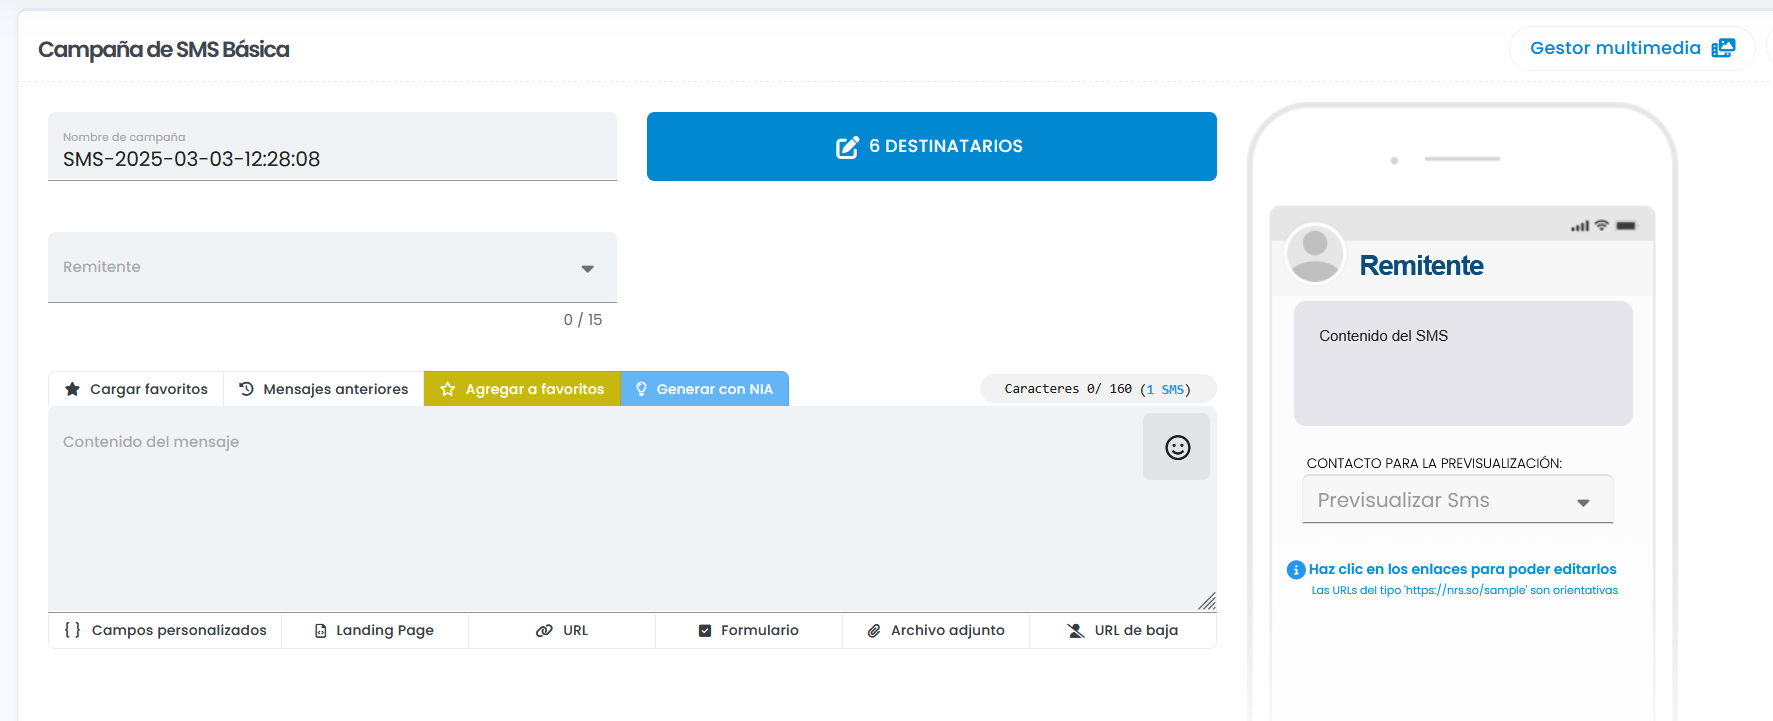
Haz clic en "crear campaña" y deberás configurar tu campaña desde la plataforma 360nrs.
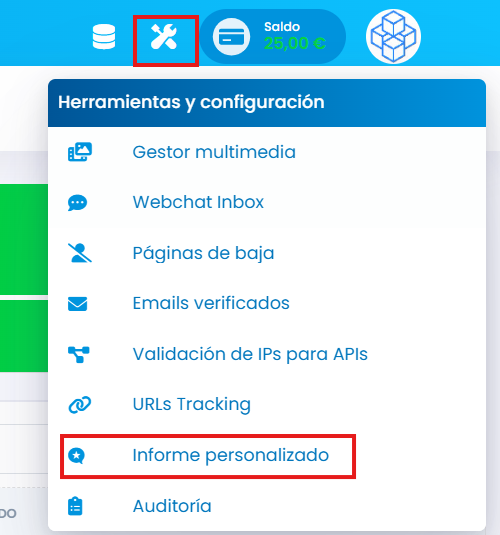
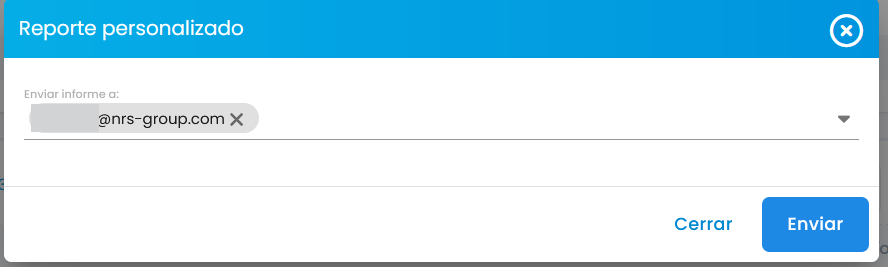
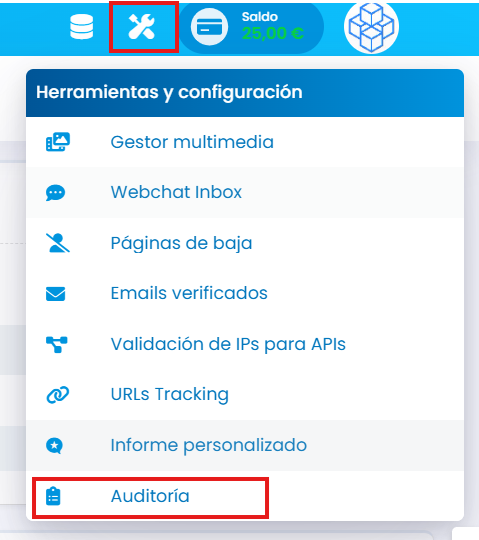
360nrs también ofrece la posibilidad de diseñar tus propios informes personalizados según las necesidades específicas de tu empresa y recíbelos directamente en tu bandeja de entrada Podrás segmentar por canal, campañas, fechas y acciones de tus clientes. Esta funcionalidad te permite recibir tus informes sin necesidad de entrar en la propia Plataforma. Para ello, haz clic en el icono de herramientas, situado en la parte superior derecha de la Plataforma de 360nrs. Selecciona la opción de "informe personalizado".
Selecciona el rango de fechas, los canales que deseas consultar, asi como las campañas.

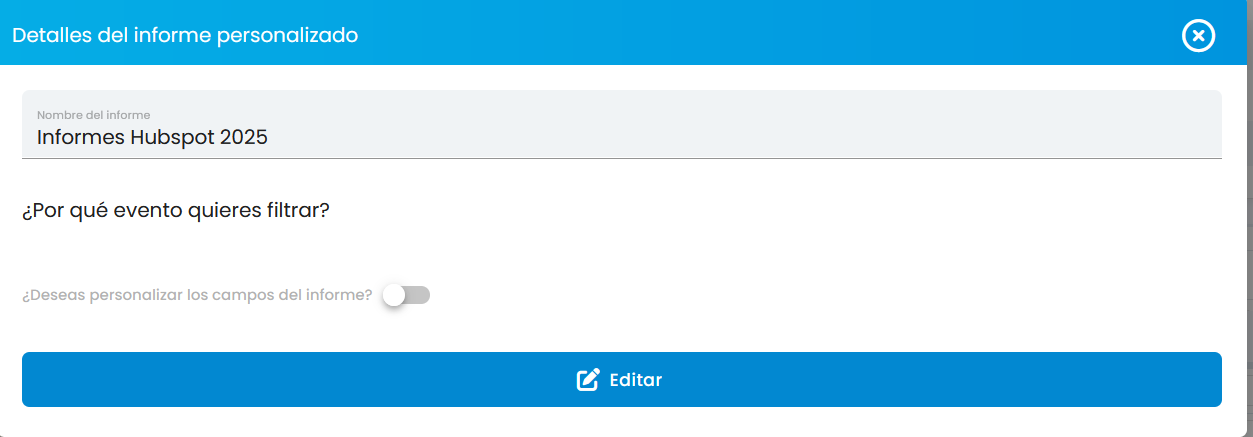
Haz clic en "Nuevo informe". Se abrirá una pestaña donde deberás indicar "el nombre del informe" y los eventos que deseas filtrar. Haz clic en "guardar"
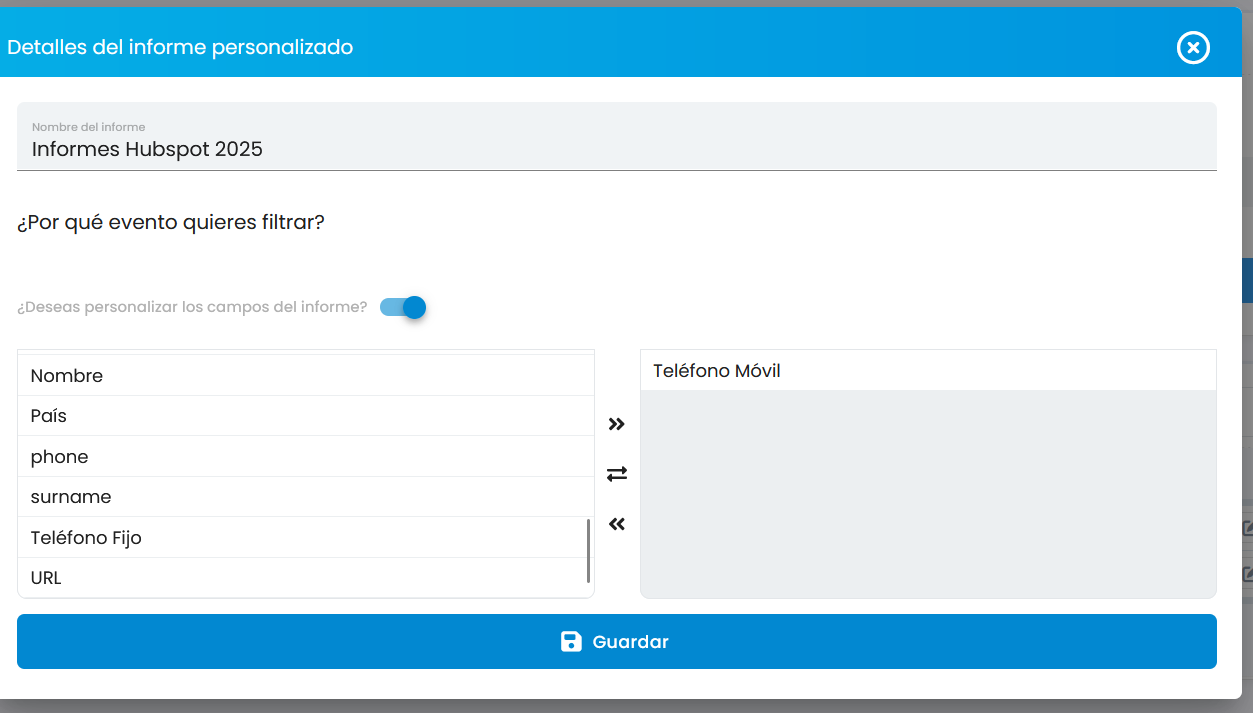

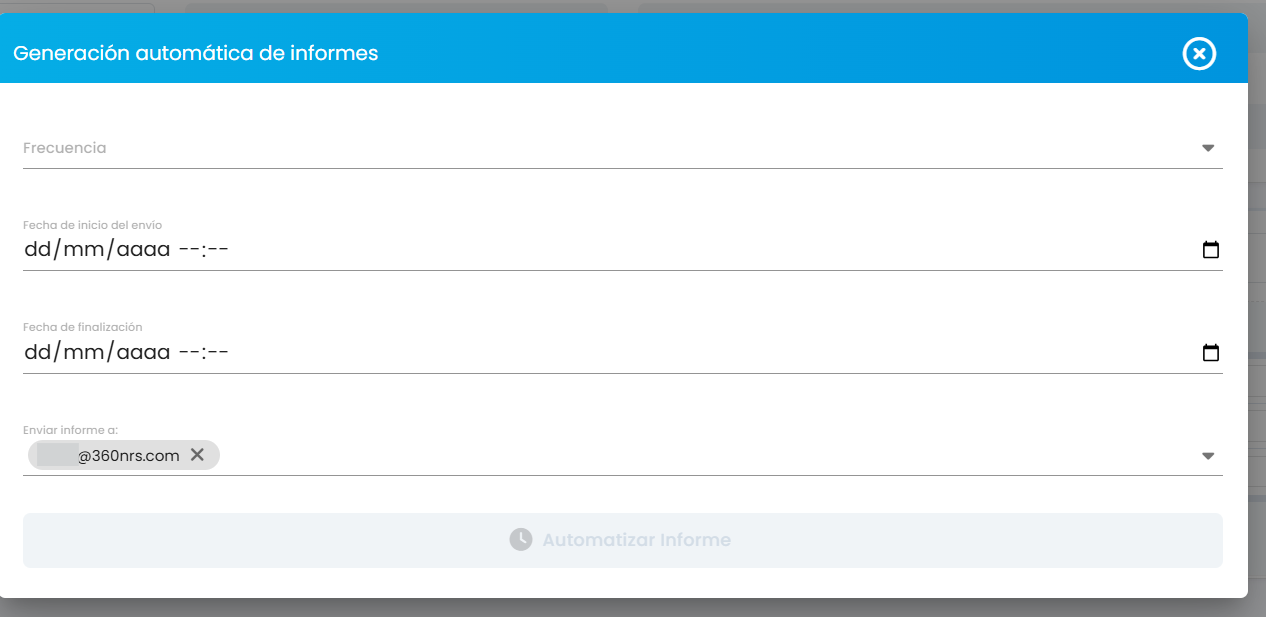
Una vez creado tu informe, podrás:


Una función clave dentro de 360nrs es la auditoría. Con este servicio, puedes acceder al historial completo de interacciones de tus contactos con tus campañas, desde aperturas hasta clics. Una forma rápida de entender el comportamiento de tus usuarios y optimizar tus estrategias. Para utilizar esta función, en la pestaña de herramientas situada en el menu superior derecho, selecciona la opción de auditoria.
Selecciona el canal o los canales que deseas consultar, al igual que los eventos. Indica el rango de fechas y busca el destinatario. Es importante añadir el prefijo.
For the system to be able to send Voicemail to contacts, the phone number must be entered in the contact details.
There are two options for making your voice calls:
Interactive voice calls are only available through Workflows.
With HubSpot's CRM Extension, you can make voice calls through 360nrs directly from each individual contact's profile. To do this, select the "contacts" option in the sidebar menu of the CRM tab.
Search and select the contact you want to impact.
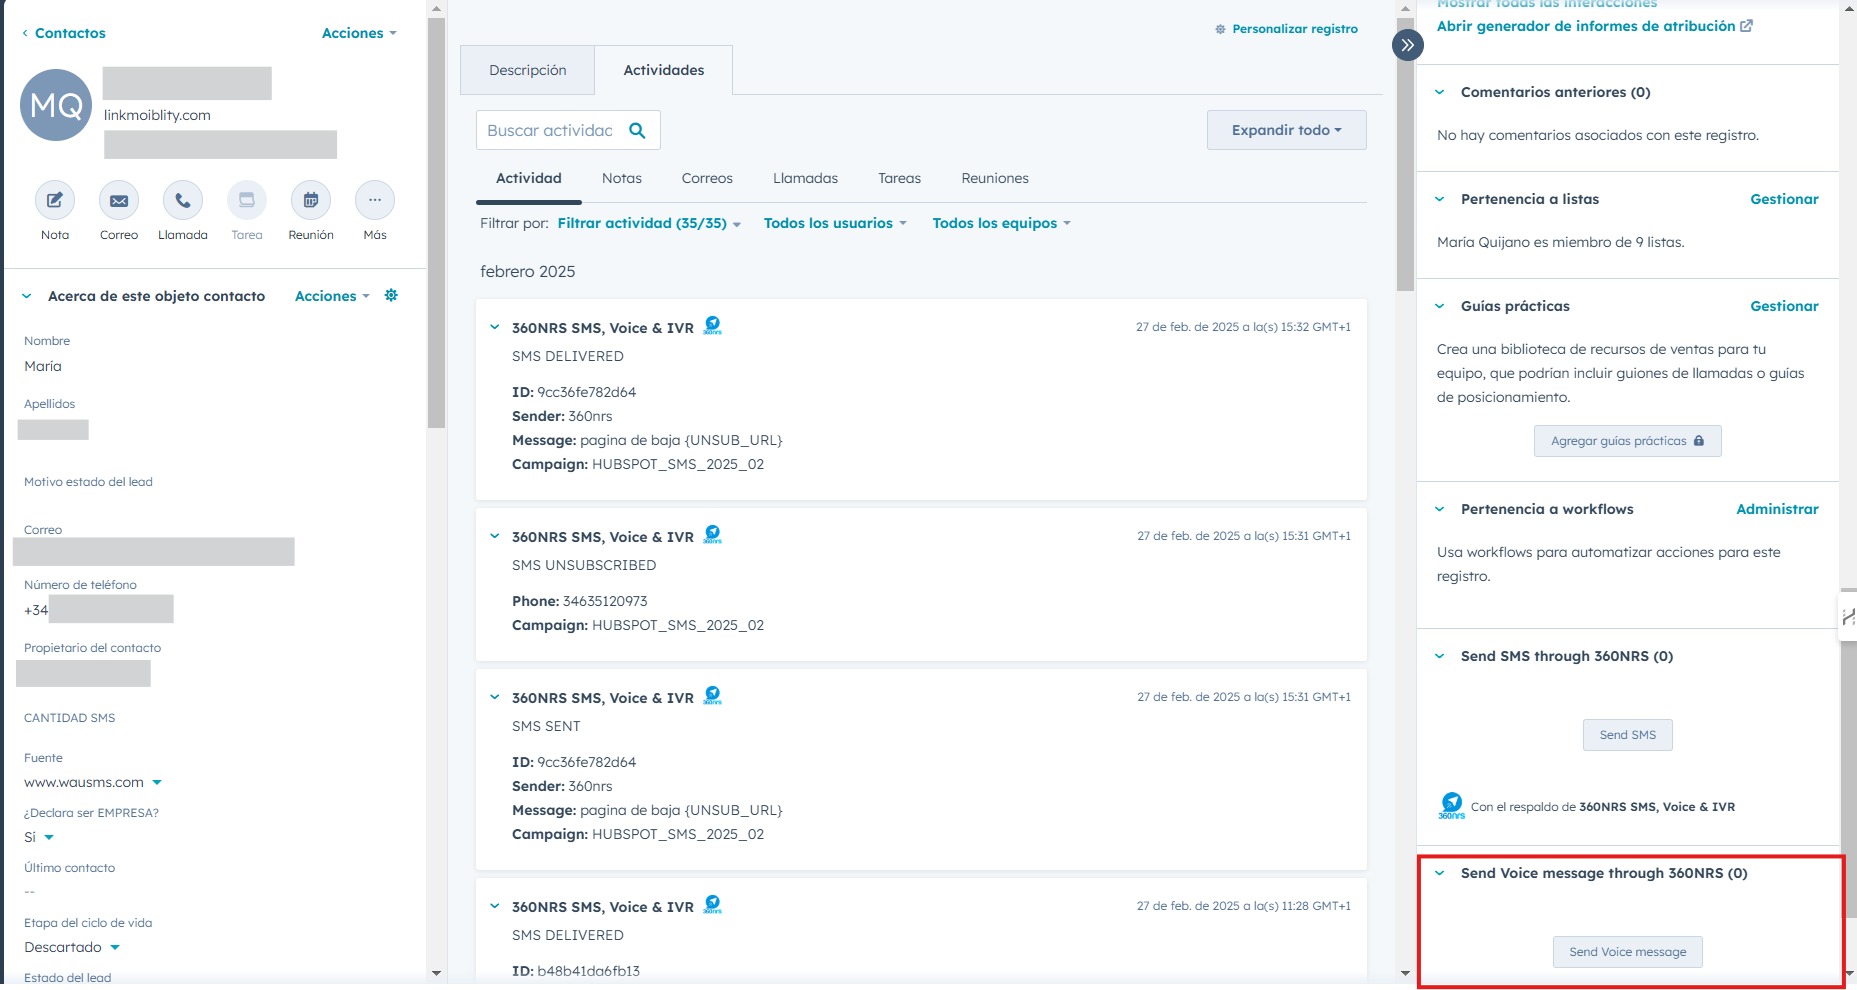
On the contact page, in the right-hand menu, find the option "Send Voice Message through 360nrs" and click it. A window will open where you'll need to configure your call.
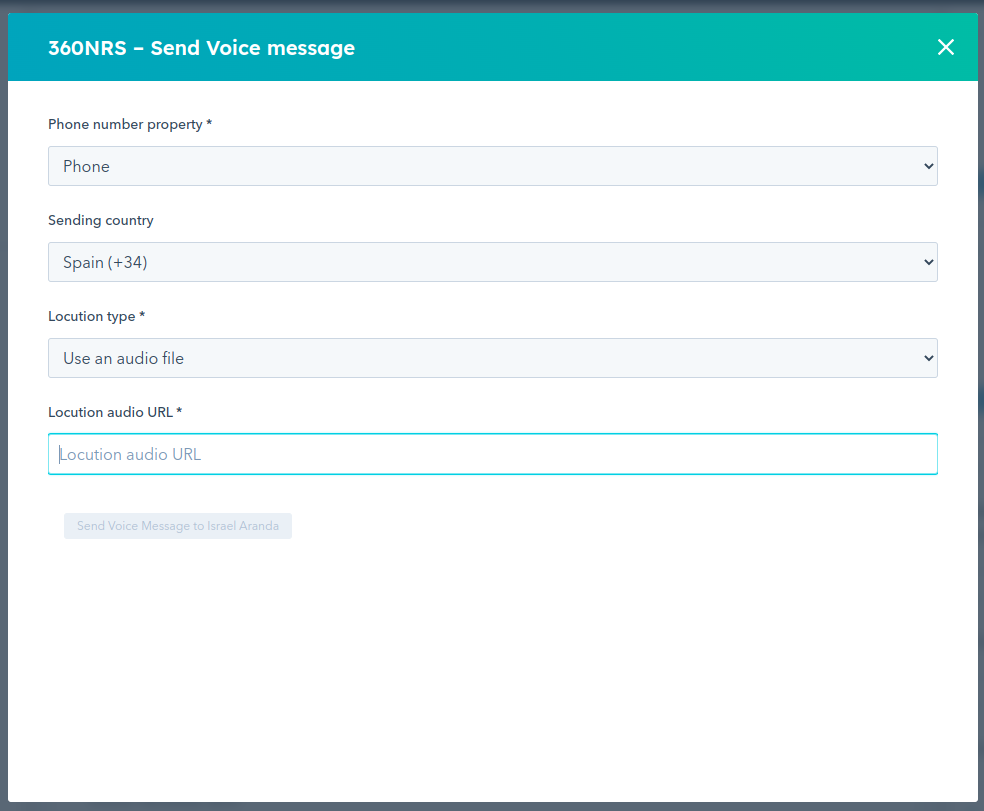
In "Phone number property" select the field that corresponds to the phone number you want to call.

In the "Sending country" field, select the country you want to send your campaign to. If the international prefix is not present, it will be automatically added to the phone numbers before sending. If the country you want to send to is not listed, please contact 360nrs Support.

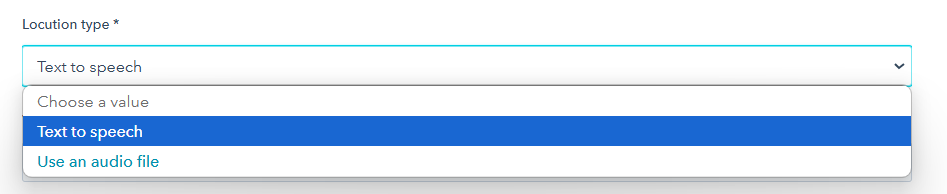
The voiceover type can be Text To Speech or Audio File.
When you select Text to Speech, you'll need to select the language of the speech and enter the text that will be converted into speech. You also have the option to add custom fields, allowing you to tailor your message with specific information for each recipient, such as their name, appointment date, or offer details. This helps create a more personalized and effective experience.
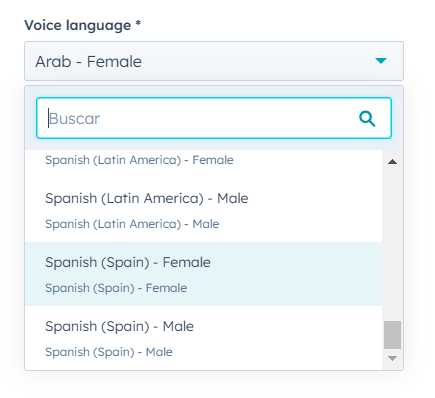
Select your preferred voice for voiceovers in "Voice Language." You can choose from different languages and genres, adapting the tone and style of your message to your audience. This will allow you to offer a more natural and personalized experience for your recipients.

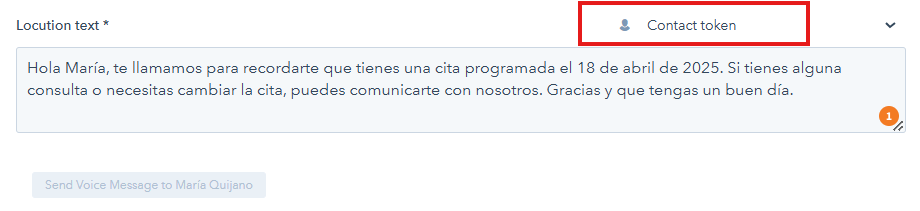
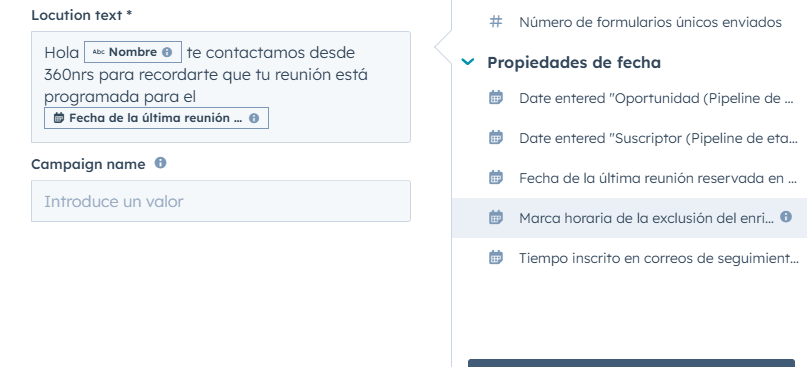
In the "Locution test" field, you'll need to compose your message, which will be transformed into a call using Text to Speech. If you want to personalize the message with recipient-specific information, click "Contact Token" and select the field you want to add (for example, name, appointment date, order number, etc.).
When the call is made, the custom field will be automatically replaced with the corresponding value from the database.
By selecting the "Audio File" option, you can paste a URL containing the audio file you want to use in the call. This allows you to play a pre-recorded message instead of generating a voiceover with Text to Speech, providing greater flexibility and control over the tone and style of your message.
To upload an audio file to HubSpot, follow these steps:
In the left-hand menu, find the Library tab. Select the Files option. In the upper right corner, click Upload File.

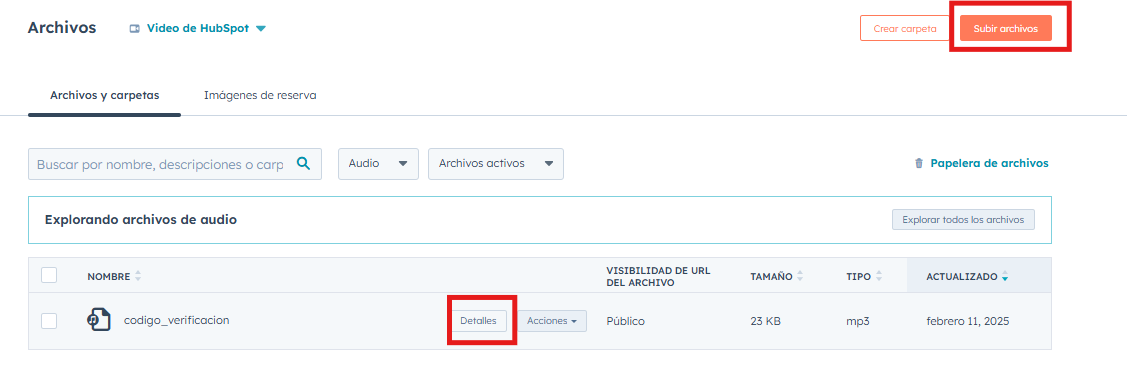
Once your file is uploaded, click "Details" to open a pop-up menu on the right. Then, in the "Access and URLs" section, select "Copy URL".
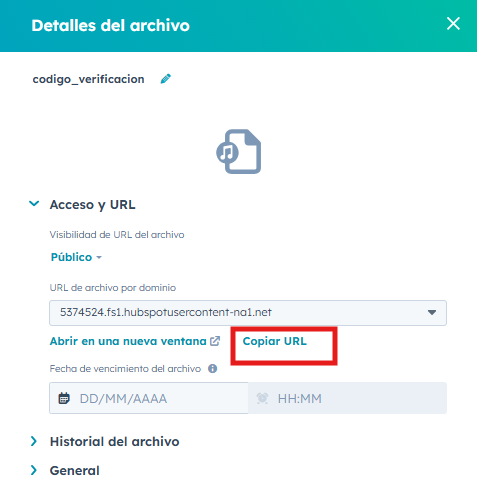
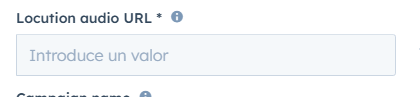
After copying the URL, you can paste it into the "Audio Voiceover URL" field.
Pressing the "Send Voice Message" button will send the voice message to the current contact.
Just like with SMS campaigns, each event, whether SENT, NOT SENT, DELIVERED, and NOT DELIVERED, will appear in the contact's Timeline.
In workflows, you can incorporate Voice Calls and Interactive Voice Calls. To create your workflow, go to the left side menu, select "Automations", and then "Workflows". Click "Create Workflow", where you can choose to use a template or start from scratch. You can learn how to create one step by step at the following link: Create Workflows
Unlike sending SMS, voice calls are only available in contact-based workflows. So, be sure to select a contact-based template or create one from scratch using this criteria.
Define the registration criteria for contacts to be included in the workflow. Select from:
Specific Events: Triggered when a contact interacts with a specific element, such as a link or button in an email. Example: A user clicks a button in a promotional email, which automatically triggers a call with a pre-recorded message offering more details about the promotion.
Filter Criteria: Allows you to segment contacts based on specific attributes and trigger personalized calls for each group. For example, if the contact's country is Spain, the workflow will send a call in Spanish with information about a local offer.
Based on a schedule: Automate calls sent at a specific time, regardless of the contact's prior interactions. Example: Every day at 8:00 a.m., an automated call is made reminding clients that they have a medical appointment scheduled for that day.
Receiving a webhook: Allows a workflow to be triggered when an external platform sends information via a webhook. Example applied to voice calls: A customer makes a purchase from an online store, which sends a webhook to HubSpot to trigger a workflow that generates an automated call confirming the order and providing delivery details.
Manual Enrollment: Allows a user to manually add contacts to a workflow based on their criteria. Example for voice calls: A sales team identifies potential customers interested in a product demo and manually enrolls them in a workflow that sends them a call with information about the demo.
This ensures that the workflow is triggered under the desired conditions.
You can add a voice call action whenever you want. To do so, follow these steps:
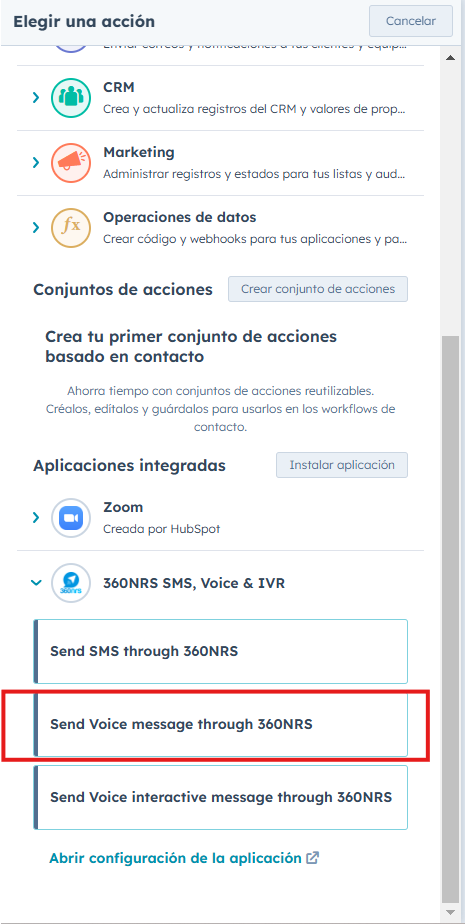
Click on the "+" icon.

From the left-hand drop-down menu, select Integrated Apps. Find and select the 360nrs integration, then Send Voice Message through 360nrs to make a voice call.
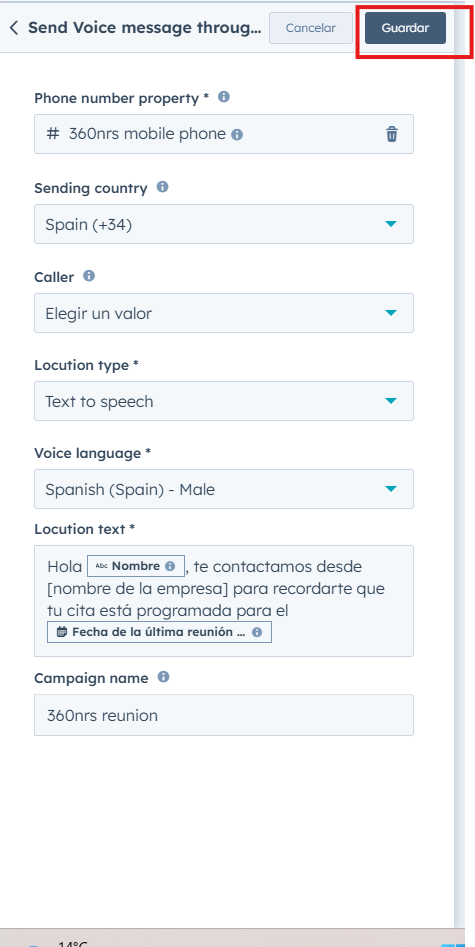
Clicking Send Voice through 360nrs will bring up a menu where you'll need to configure your campaign. The first thing you'll need to do is select the property containing the phone number in the Phone number property field. This will open a tab with all your HubSpot properties. Find and select the property that corresponds to the phone number to ensure your calls are routed correctly.

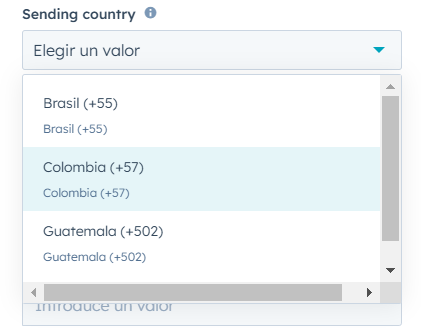
Next, select the country you want to send your campaign to. If the international prefix isn't present, it will be automatically added to the phone numbers before sending. If the country you want to send to isn't listed, please contact 360nrs support.
🏴 The campaign name will help you identify it more easily.
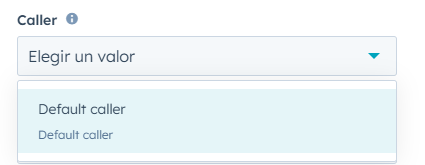
Under "Caller," you'll need to select your caller ID if you have a custom one. If you'd like to set up your own caller ID, please contact 360nrs Support.
Customizing your caller ID in 360nrs offers several strategic advantages that can improve response rates and recipient trust. The benefits of using a personalized caller ID include:
Higher answer rate: A recognizable number or name increases the likelihood that recipients will answer the call, compared to unknown or generic numbers.
Brand Identity Reinforcement: By displaying your company name or a number associated with your business, you reinforce your brand's credibility and presence on every call.
Reduction in call blocking or rejection: Unknown numbers are often ignored or blocked by users. With a custom caller ID, you reduce the chances of your call being flagged as spam.
Greater trust and security: Displaying a personalized identifier generates trust in the recipient, since they will know in advance who is calling them, avoiding suspicions of fraud or unwanted calls.
Makes it easier to return calls: If users recognize the number or name, they are more likely to return the call if they are unable to answer, improving communication with customers and prospects.
If you don't have a custom caller ID, click "Default Caller."
The voiceover type can be Text To Speech or Audio File.
When you select Text to Speech, you'll need to select the language of the speech and enter the text that will be converted into speech. You also have the option to add custom fields, allowing you to tailor your message with specific information for each recipient, such as their name, appointment date, or offer details. This helps create a more personalized and effective experience.
Select your preferred voice for voiceovers in "Voice Language." You'll be able to choose from different languages and genres, adapting the tone and style of your message to your audience. This will allow you to offer a more natural and personalized experience for your recipients.
In the "Locution test" field, you'll need to compose your message, which will be transformed into a call using Text to Speech. If you want to personalize the message with recipient-specific information, select the custom field you want to add from the menu on the right (for example, name, appointment date, order number, etc.).
When the call is made, the custom field will be automatically replaced with the corresponding value from the database.
By selecting the "Audio File" option, you can paste a URL containing the audio file you want to use in the call. This allows you to play a pre-recorded message instead of generating voiceovers with Text to Speech, providing greater flexibility and control over the tone and style of your message. Paste your URL into the "Locution audio URL."
Finally, you can name your campaign. Although this is optional, it will help you identify it more easily and improve organization.
By assigning a name, you'll be able to quickly locate it within the 360nrs platform. If you don't enter a name, the campaign will automatically be grouped under the following format HUBSPOT_CHANNEL_YEAR_MONTH. Adding a name to your campaign will also allow you to branch more easily based on the status of your sendings.
Once you have set up your voice call, click save.
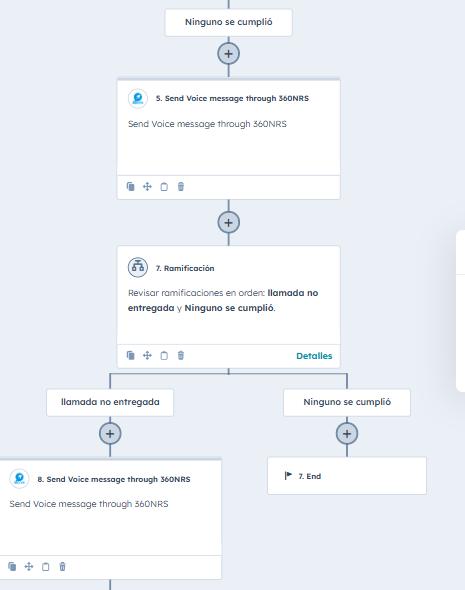
The Send Voice via 360nrs action will be integrated into the Workflow:
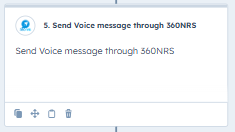
When the Workflow is executed and reaches that action, the Voice message will be sent.
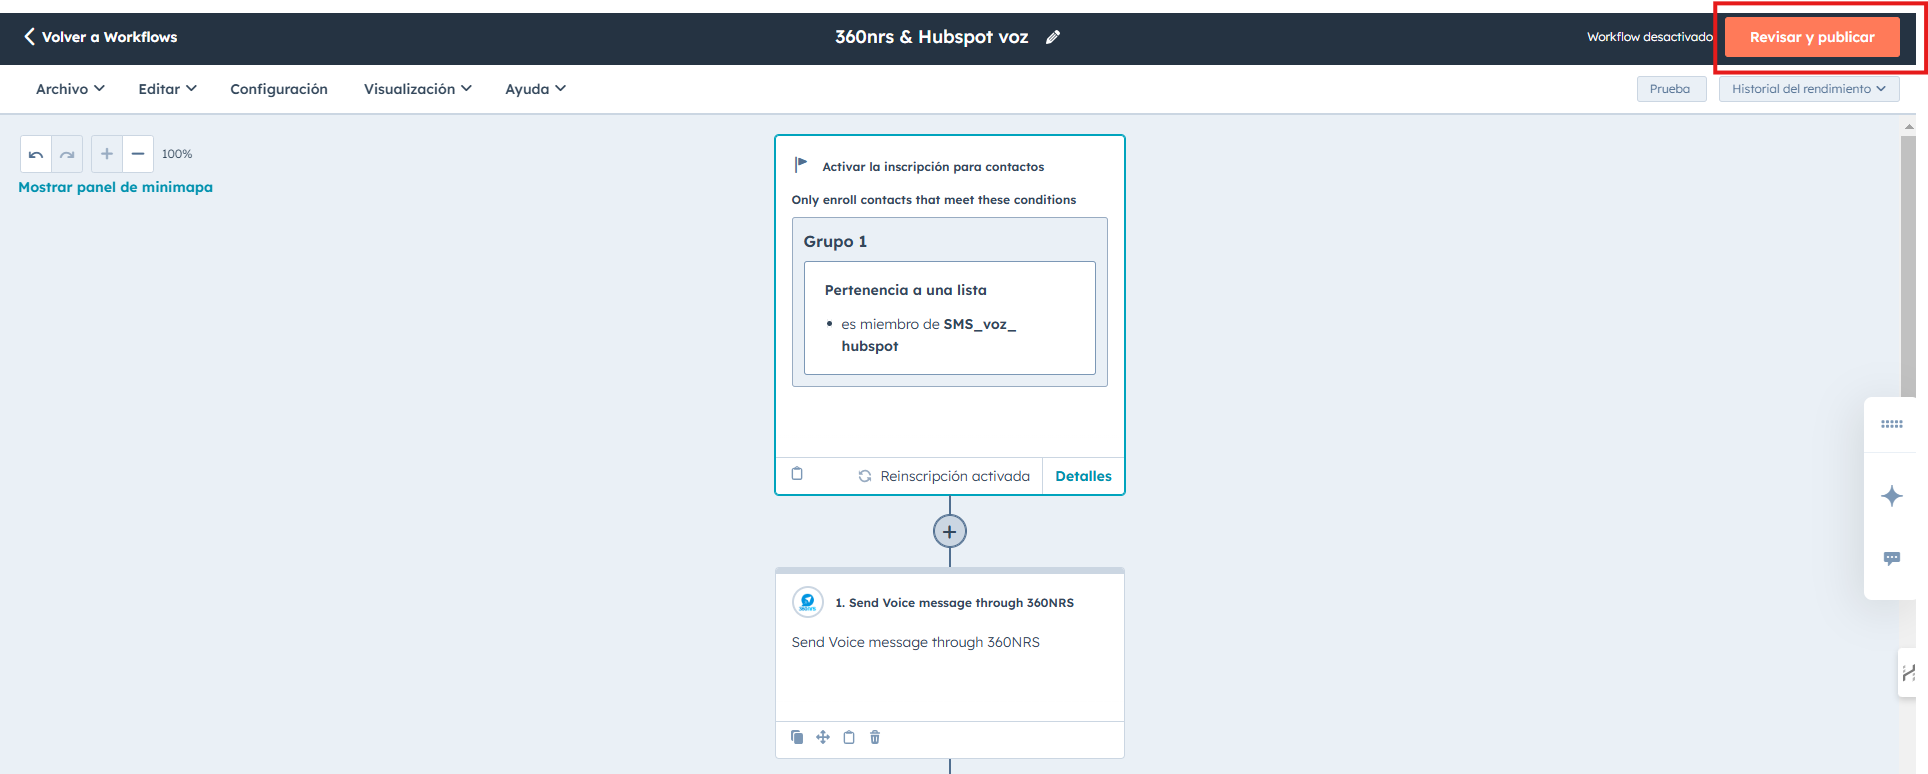
Once you've finished setting up your workflow, click "Review and Publish" to activate it and put it into action. You'll need to decide whether you want to include only eligible contacts in the workflow after activation, or also those who already meet the requirements.
You can deactivate and edit the workflow at any time.
Interactive voice calls, also known as IVR (Interactive Voice Response), can only be made through workflow. They are not available from contact records.
Like voice calls, they can only be incorporated into workflows based on "contacts."
Once you've created a contact-based workflow and selected the enrollment criteria, you can add an interactive voice call action at any time. To do so, follow these steps:
Click on the "+" icon.
From the left-hand drop-down menu, select "Built-in Apps".
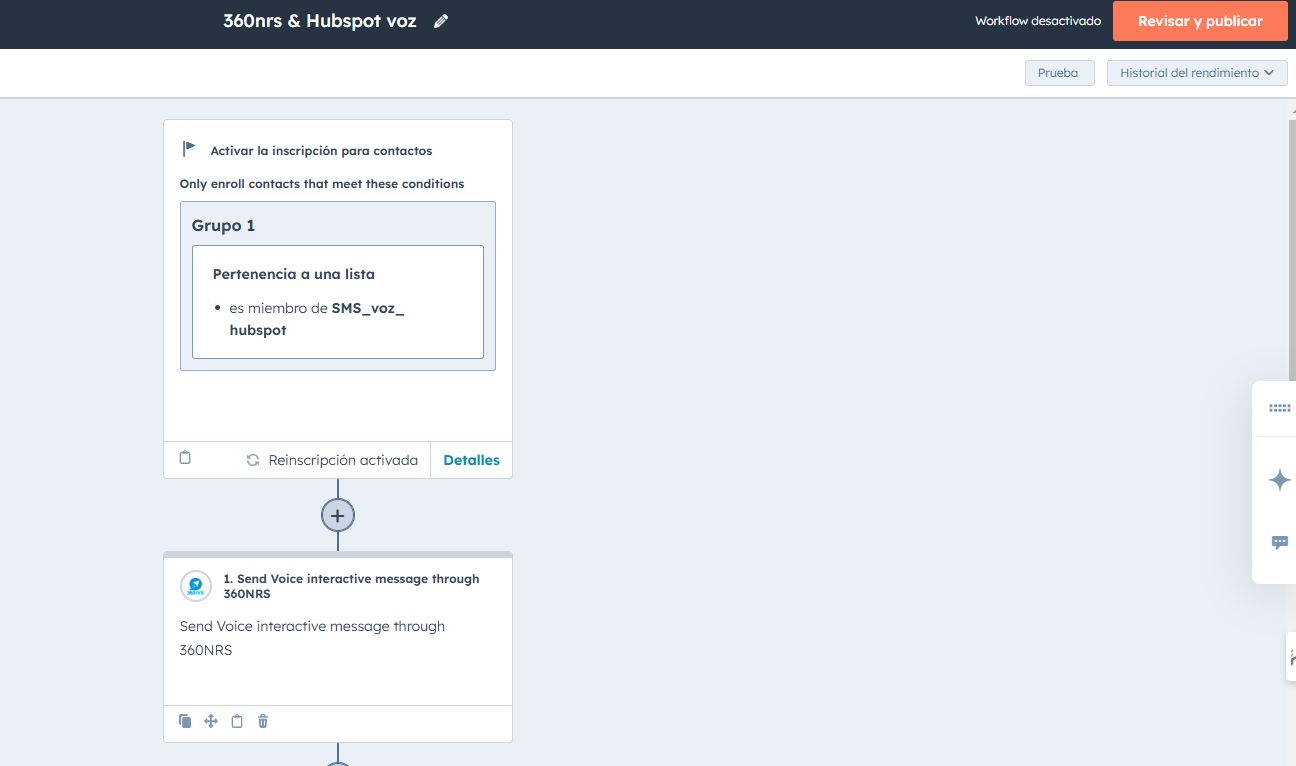
Search for and select the 360nrs integration. Then, choose the Send Voice Interactive Message through 360nrs option to make an interactive voice call.
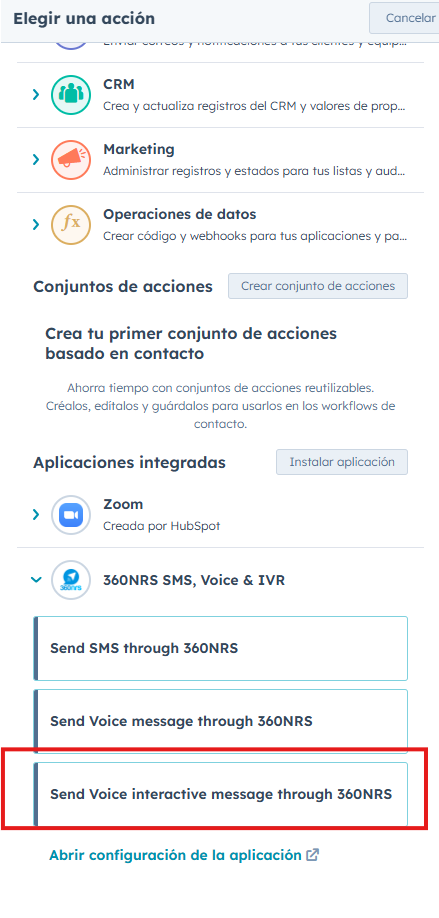
Click "Send Interactive Voice via 360nrs", a pop-up menu will open where you can configure your voice call.
The Phone number property, Sending country, Caller, Locution type and Campaign name fields must be configured following the same instructions as for voice calls.
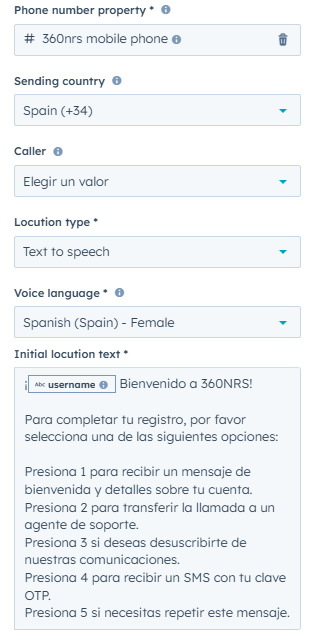
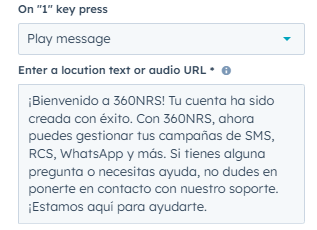
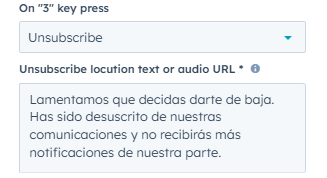
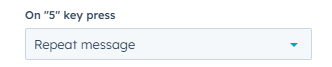
You can assign up to nine actions, one for each number on the numeric keypad (0-9). The available actions are as follows:
Play a message: Pressing the key will play a voiceover. You can write the text you want to speak or use an audio file by providing its URL. If you choose to write the text, you can include custom fields.
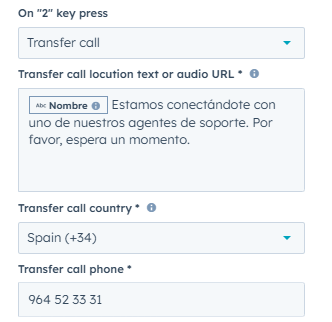
Transfer Call: Pressing the key will transfer the call to a phone number. If you select the text-to-speech option, enter a voiceover text. If you prefer to use an audio file, enter the file's URL. To set up your call:
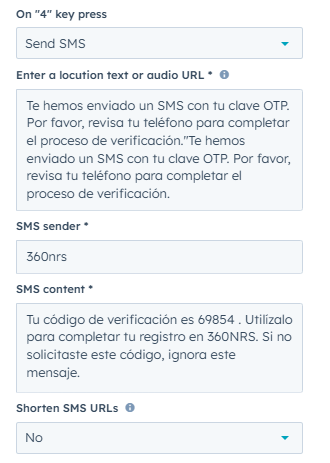
Send SMS: Pressing the key will send a text message. Enter a voice message if you selected the text-to-speech option. Then configure your text message:
Additionally, it is possible to configure a voice prompt in case an incorrect key is pressed.

Once you have set up your voice call and all the interactions, click save.
When the Workflow runs and reaches that action, the interactive voice call will be made.
Once you've finished setting up your workflow, click "Review and Publish" to activate it and put it into action. You'll need to decide whether you want to include only eligible contacts in the workflow after activation, or also those who already meet the requirements.
As we mentioned in SMS, in workflows you can configure automated actions based on the status of your campaign, optimizing interaction with your contacts and making your emails more effective.
For example, if a person hasn't answered your call, you can automatically schedule a new call specifically targeted to them, ensuring strategic follow-up.
This feature allows you to re-engage users more precisely, increasing conversion opportunities and improving your campaign's response rate. Additionally, you can combine different channels and actions within the workflow to offer an even more personalized experience to each contact.
To do this:
Click "Add Branch".
Select a branch based on "AND/OR Logic".
Click "Add Criteria" and under Integration Filters, choose 360nrs.
Select the criteria on which you want to act:
VOICE_NOT_SENT: The voice message has not been sent.
VOICE_DELIVERED: The voice message has been successfully sent and delivered to the recipient.
VOICE_NOT_DELIVERED: The voice message could not be delivered to the recipient.
If it's an interactive call, you can also choose from these additional criteria:
VOICE_KEY_PRESSED: The user has pressed a key during the call.
VOICE_UNSUBSCRIBED: The user has unsubscribed from the voice channel.
| In case of including a call in IVR |
|---|
| VOICE_SENT: The voice call has been sent. |
| VOICE_NOT_SENT: The voice call has not been sent. |
| VOICE_DELIVERED: The voice call has been delivered successfully. |
| VOICE_NOT_DELIVERED: The voice call could not be delivered. |
| In case of including sending an SMS in IVR |
|---|
| SMS_UNSUBSCRIBED: The user has unsubscribed from the SMS channel. |
| SMS_RESPONSE: The user has responded to the SMS. |
| SMS_SENT: The SMS has been sent. |
| SMS_NOT_SENT: The SMS has not been sent. |
| SMS_DELIVERED: The SMS has been delivered successfully. |
| SMS_NOT_DELIVERED: The SMS could not be delivered. |
| SMS_CLICKED: The user has clicked on the link in the SMS. |
To complete the setup, you need to define the relationship between the condition and the corresponding value, which will allow the filter to be applied correctly in the automation.
Choose the appropriate option based on how you want to compare the data. Some of the available options include:
Depending on the condition you choose, enter the value to compare the information with. This can be one of the following:
Timelines are used to display each of the events that occur in HubSpot.
When you send a Voice message through 360nrs, either through the CRM extension or through a workflow, the following events and statuses may occur:
| EVENTS |
|---|
| VOICE MESSAGE SENT |
| VOICE MESSAGE NOT SENT |
| VOICE MESSAGE DELIVERED |
| VOICE MESSAGE NOT DELIVERED |
| VOICE MESSAGE KEY PRESSED |
| UNSUBSCRIBED VOICE MESSAGE |
| STATES |
|---|
| VOICE MESSAGE SENT > VOICE MESSAGE DELIVERED |
| VOICE MESSAGE SENT > VOICE MESSAGE DELIVERED > VOICE MESSAGE KEY PRESSED |
| VOICE MESSAGE SENT > VOICE MESSAGE DELIVERED > VOICE MESSAGE KEY PRESSED > VOICE MESSAGE UNSUBSCRIBED |
| VOICE MESSAGE SENT > VOICE MESSAGE NOT DELIVERED |
| VOICE MESSAGE NOT SENT |
This means that for a Voice Message to be DELIVERED or UNDELIVERED, it must first be SENT. Therefore, two events will appear in the Timeline.
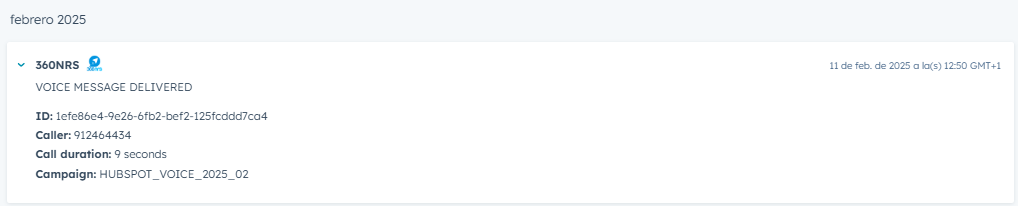
Timeline Example, VOICE MESSAGE DELIVERED

You can see more details by clicking:
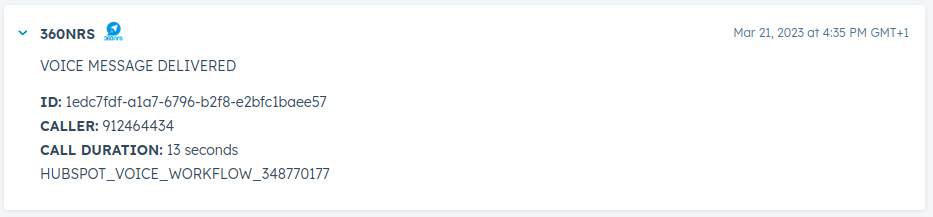
The ID that appears just above the sender is the 360nrs Voicemail ID. If you have any issues, you can contact 360nrs support (support@360nrs.com) and provide that ID.
If a campaign name has been entered from the Workflow, it will also appear in the timeline.
Just like with SMS messages, you can view statistics from various sections:
For more details on how to access and analyze statistics, please review the Statistics section.
To disconnect your 360nrs account from HubSpot, simply access the 360nrs platform (https://app.360nrs.com). Within the platform, click on the "Integrations" tab in the central menu and select "HubSpot" from the submenu that appears.

Click the "Disconnect from HubSpot" button.
The following message will appear: "Your account has been successfully disconnected." To use the integration again, you'll need to set up your account again.
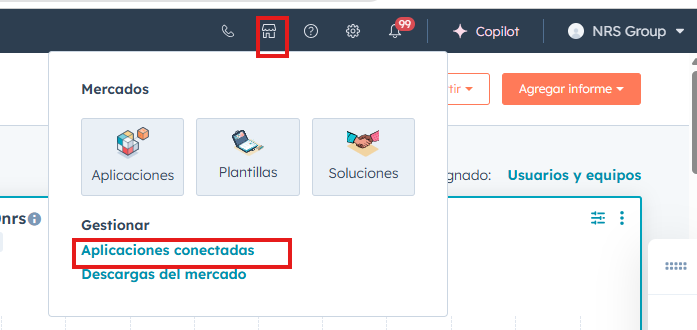
You can also do this from HubSpot. To do so, log in to your HubSpot account, click the "Marketplace" icon, and select "connected apps."
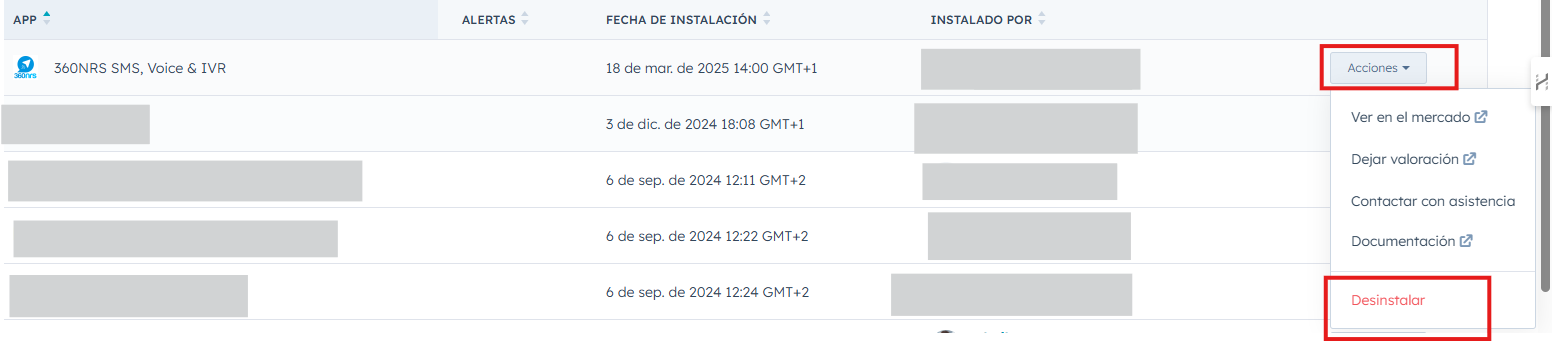
Find the 360nrs app and open the action menu. Click Uninstall.
Once you've confirmed that you want to uninstall the app, you'll be able to indicate the reason for your wish to uninstall it. Once you've chosen your reason, click "Done." The app will be uninstalled.
Once your account is disconnected, you will not be able to view sent campaigns in your contacts' activity history in HubSpot. Data from previous campaigns will not be displayed in HubSpot.
In 360nrs, all campaign information will be retained for a period of one year from the date of creation. You can view this data in the statistics section while it is available. If you need to retain it longer, we recommend exporting it before the end of this period. If you wish to completely delete your 360nrs data before this period ends, you must request it through our technical support.
If you include voice calls, IVRs, or SMS in active workflows, you will see the following message:
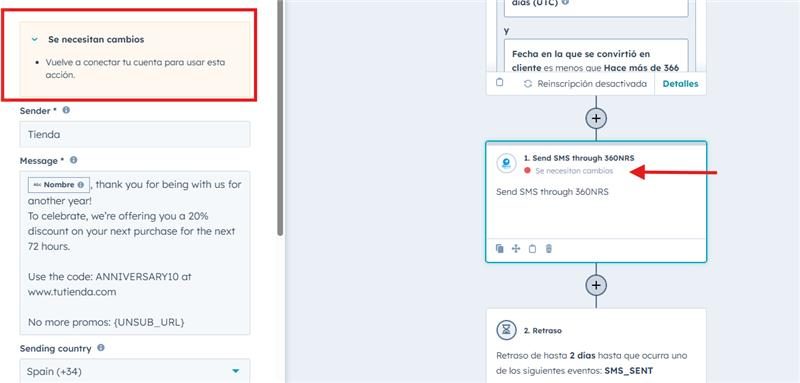
Actions cannot be completed until you reconnect your account.
If you reconnect your account to HubSpot, you'll see all of your previous campaign information in your contact activity history.
The 360nrs integration with HubSpot requires specific permissions to access and manage data within the CRM. These permissions allow the app to read and write information about contacts, companies, and deals, as well as interact with HubSpot's timeline and automation.
Main Permissions (Required Scopes):
Optional permission:
automation → Provides access to HubSpot Workflows. This allows the 360nrs app to integrate into automated workflows, triggering SMS, voice calls, or IVRs based on predefined events within the CRM.
These permissions ensure that the 360nrs app runs smoothly within HubSpot, enabling efficient management and tracking of SMS and voice communications, with full traceability within the CRM.
basic character set| 0x00 | 0x10 | 0x20 | 0x30 | 0x40 | 0x50 | 0x60 | 0x70 | |
| 0x00 | @ | Δ | SP | 0 | ¡ | P | ¿ | p |
| 0x01 | £ | _ | ! | 1 | A | Q | a | q |
| 0x02 | $ | Φ | " | 2 | B | R | b | r |
| 0x03 | ¥ | Γ | # | 3 | C | S | c | s |
| 0x04 | è | Λ | ¤ | 4 | D | T | d | t |
| 0x05 | é | Ω | % | 5 | E | U | e | u |
| 0x06 | ù | Π | & | 6 | F | V | f | v |
| 0x07 | ì | Ψ | ' | 7 | G | W | g | w |
| 0x08 | ò | Σ | ( | 8 | H | X | h | x |
| 0x09 | Ç | Θ | ) | 9 | I | Y | i | y |
| 0x0A | LF | Ξ | * | : | J | Z | j | z |
| 0x0B | Ø | ESC | + | ; | K | Ä | k | ä |
| 0x0C | ø | Æ | , | < | L | Ö | l | ö |
| 0x0D | CR | æ | - | = | M | Ñ | m | ñ |
| 0x0E | Å | ß | . | > | N | Ü | n | ü |
| 0x0F | å | É | / | ? | O | § | o | à |
* Special characters
extended character set| 0x00 | 0x10 | 0x20 | 0x30 | 0x40 | 0x50 | 0x60 | 0x70 | |
| 0x00 | | | |||||||
| 0x01 | ||||||||
| 0x02 | ||||||||
| 0x03 | ||||||||
| 0x04 | ^ | |||||||
| 0x05 | € | |||||||
| 0x06 | ||||||||
| 0x07 | ||||||||
| 0x08 | { | |||||||
| 0x09 | } | |||||||
| 0x0A | FF | |||||||
| 0x0B | SS2 | |||||||
| 0x0C | [ | |||||||
| 0x0D | CR2 | ~ | ||||||
| 0x0E | ] | |||||||
| 0x0F | \ |
* Special characters
basic character set| 0x00 | 0x10 | 0x20 | 0x30 | 0x40 | 0x50 | 0x60 | 0x70 | |
| 0x00 | @ | Δ | SP | 0 | Í | P | ~ | p |
| 0x01 | £ | _ | ! | 1 | A | Q | a | q |
| 0x02 | $ | ª | " | 2 | B | R | b | r |
| 0x03 | ¥ | Ç | # | 3 | C | S | c | s |
| 0x04 | ê | À | º | 4 | D | T | d | t |
| 0x05 | é | ∞ | % | 5 | E | U | e | u |
| 0x06 | ú | ^ | & | 6 | F | V | f | v |
| 0x07 | í | \ | ' | 7 | G | W | g | w |
| 0x08 | ó | € | ( | 8 | H | X | h | x |
| 0x09 | ç | Ó | ) | 9 | I | Y | i | y |
| 0x0A | LF | | | * | : | J | Z | j | z |
| 0x0B | Ô | ESC | + | ; | K | Ã | k | ã |
| 0x0C | ô | Â | , | < | L | Õ | l | õ |
| 0x0D | CR | â | - | = | M | Ú | m | ` |
| 0x0E | Á | Ê | . | > | N | Ü | n | ü |
| 0x0F | á | É | / | ? | O | § | o | à |
* Special characters
** Characters different from GSM
extended character set| 0x00 | 0x10 | 0x20 | 0x30 | 0x40 | 0x50 | 0x60 | 0x70 | |
| 0x00 | | | |||||||
| 0x01 | À | Â | ||||||
| 0x02 | Φ | |||||||
| 0x03 | Γ | |||||||
| 0x04 | ^ | |||||||
| 0x05 | ê | Ω | Ú | € | ú | |||
| 0x06 | Π | |||||||
| 0x07 | Ψ | |||||||
| 0x08 | Σ | { | ||||||
| 0x09 | ç | Θ | } | Í | í | |||
| 0x0A | FF | |||||||
| 0x0B | Ô | SS2 | Ã | ã | ||||
| 0x0C | ô | [ | Õ | õ | ||||
| 0x0D | CR2 | ~ | ||||||
| 0x0E | Á | ] | ||||||
| 0x0F | á | Ê | \ | Ó | ó | â |
* Special characters
** Characters different from GSM
Many countries have regulations designed to protect users from unwanted communications, both via SMS and voice calls. To ensure your campaigns reach their destination correctly and avoid blocks or penalties, it is essential to adhere to these rules.
Each country defines its own conditions and restrictions regarding commercial communications, so it is important to understand and respect the specifics of each. It is important to keep in mind that these conditions and restrictions are subject to the current legislation of each country and may change. {{NAME}} is not responsible for non-compliance with these policies; the responsibility lies with the client.
Below, you will find the restrictions for the main countries so you can operate safely and effectively. If you have any questions or if the recipient country is not listed below, we recommend contacting our customer service team.
Commercial or promotional SMS messages sent to France must comply with certain legal regulations, which are described below. Transactional messages, however, are not subject to these restrictions.
Sending messages related to politics, religion, gambling, or unsolicited promotions is strictly prohibited.
Marketing SMS messages can only be sent Monday through Saturday, between 8:00 AM and 10:00 PM. Any messages sent outside of these hours will be automatically blocked and scheduled for resending at the next permitted time. That is, if you try to send an SMS on Sunday at 2:00 PM, it won't be sent until Monday at 8:00 AM.
Contact {{SUPPORT_EMAIL}} for more information and to validate your sender.
It is mandatory to add the STOP au [STOP_CODE] as an opt-out instruction at the end of your marketing SMS messages to France.
SMS messages sent to Spain have certain legal conditions. Any SMS identified as marketing content will be subject to the conditions listed in the sections below.
Sending messages related to political or religious topics, gambling, or unsolicited promotions is strictly prohibited.
SMS messages sent to the United Kingdom are limited to certain regulatory conditions. Any SMS messages identified as marketing content will be subject to the conditions listed below.
Sending messages related to political or religious themes or unsolicited promotions is strictly prohibited.
If you send adult or gambling content, you must ensure that the recipient's age has been verified in compliance with PSA and Ofcom Guidelines.
Commercial or promotional SMS messages sent to the United States must comply with certain legal regulations, which are described below. Transactional messages, however, are not subject to these restrictions.
The use of public URL shorteners, such as bit.ly or tinyurl, is not permitted. However, the use of custom domains within these services is permitted. Therefore, you may use {{NAME}}'s own URL shortener.
In addition, sending messages containing sexually explicit or pornographic content, abusive or harassing material, information related to firearms, including fireworks, or references to alcohol, tobacco, or illegal drugs is strictly prohibited. Sending messages about gambling, investment opportunities, the repeated sending or receiving of one-time access codes (OTPs) on behalf of other providers, activities considered high financial risk, loans or loan forgiveness, credit repair services, debt collection, or tax-related matters is also prohibited. Likewise, content linked to cryptocurrency, including those related to OTPs, unsolicited real estate inquiries such as WeBuyHomes, or promotions associated with multi-level marketing is not permitted.
Contact {{SUPPORT_EMAIL}} for more information and to validate your sender.
Marketing SMS messages can only be sent Monday through Friday, between 7:00 AM and 7:00 PM, and Saturdays from 8:00 AM to 3:00 PM. Sending promotional messages is not permitted on Sundays and public holidays. Any messages sent outside of these hours will be automatically blocked and scheduled for forwarding at the next permitted time. This means that if you attempt to send an SMS on Sunday at 2:00 PM, it will not be sent until Monday at 8:00 AM.
Promotional SMS content may, in some cases, require prior registration before sending. Additionally, the {{NAME}} platform may automatically add the sender's name to the beginning of the message or include a URL at the end, depending on the channel's or destination country's conditions.
Sending messages related to political or religious topics, gambling, or unsolicited promotions is strictly prohibited.
Before sending any marketing traffic, the express consent (opt-in) of mobile device users is required.
Sending messages related to politics, religion, gambling, or unsolicited promotions is strictly prohibited.
Contact {{SUPPORT_EMAIL}} for more information and to validate your sender.
 Salesforce
 Zapier
 Salesmanago
 Klaviyo
 360nrs APIs
